


Corsair Hydro Series H50 - Installation and performance
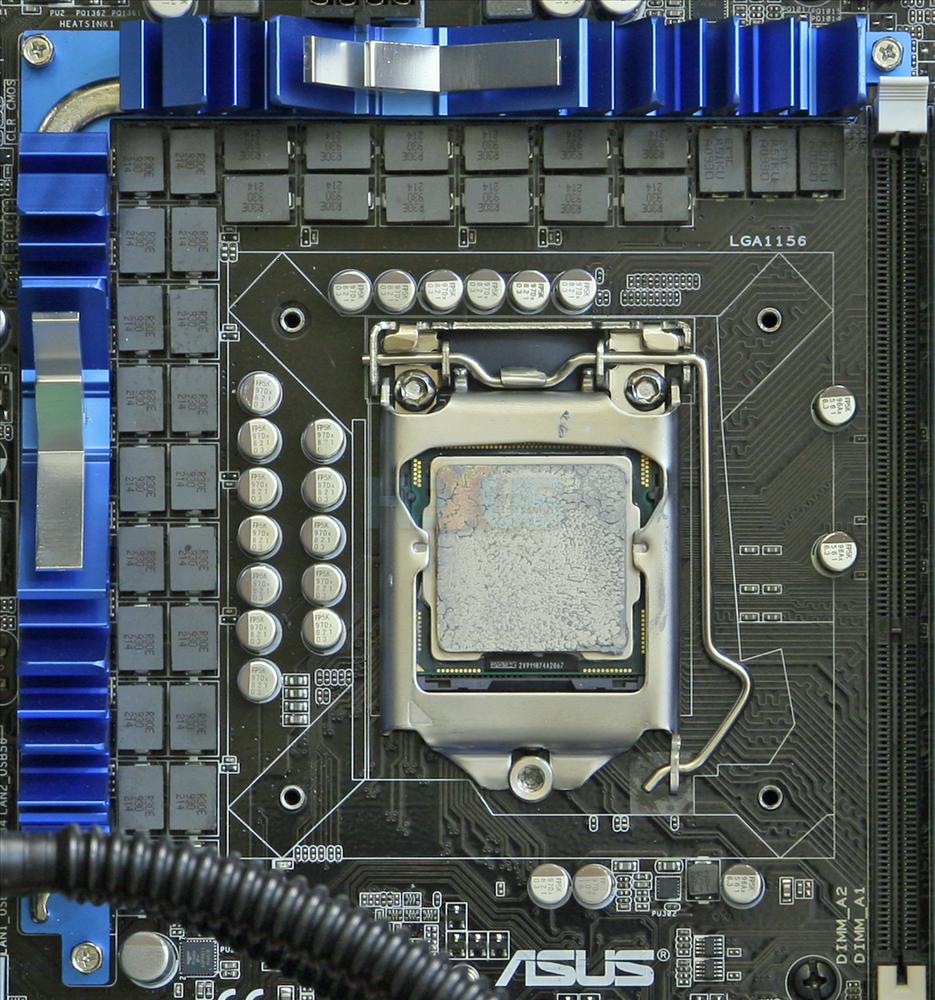
Like the Arctic Cooling Freezer Xtreme, the Corsair H50 has T.I.M. pre-applied which makes installation that little bit quicker than the norm. Though, once again, no replacement T.I.M. is supplied and subsequent installations are unlikely to perform adequately without purchasing some additional thermal grease.
Installing a water-cooling solution, even a sealed pre-plumbed kit like this, is always going to be a bit more involved than the typical heatsink-and-fan combo; however Asetek, who produces the H50 for Corsair, have done a pretty good job of making this simple. Apart from some niggling issues in the instructions as outlined below, the whole process was simple and relatively quick.
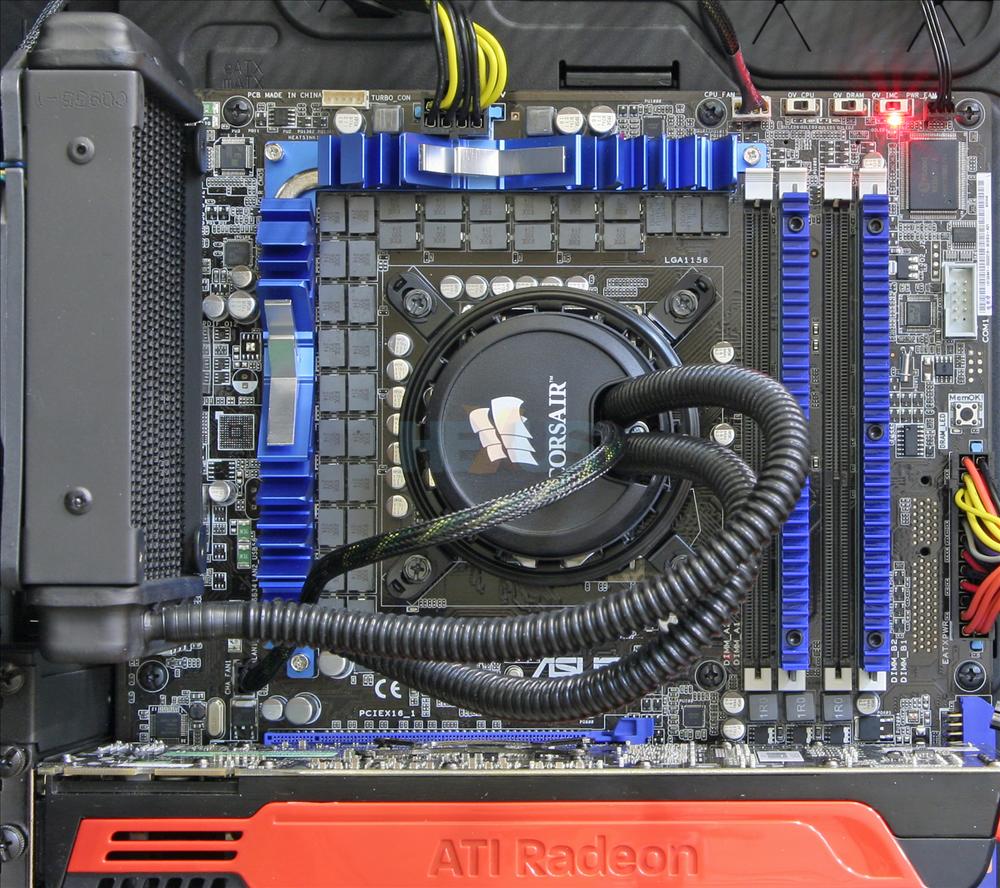
The radiator is installed first and requires a chassis that has an externally-accesible 120mm fan mount. This is secured using four long bolts with washers that go through both holes of the supplied 120mm fan into tapped holes on the radiator. Readers should note, however, that too many turns of the screw can lead to easy distortion of the fan frame, as illustrated above. And, if you've little mechanical sympathy, you could either snap one corner of the fan, or strip the thread in the radiator.
The next part of the installation process is the same as several of the other coolers on test, and involves the assembly and fitting of the retention bracket/frame. Unless you have a recent, well designed chassis with a cutout on the back of the motherboard tray, this part will require the complete removal of the motherboard from the chassis. Utilising the Corsair 800D prevented us from experiencing this inconvenience, however other niggling issues were encountered.
The sample supplied utilises Corsair's new retention brackets and screw inserts for the retaining ring. These enable Intel LGA1156 support, as well as support for AMD's AM3 and AM2 CPU's out of the box. This would be great except for some faults in the supplied instructions.
The retention backplate and retaining ring assembly instructions are mixed up, and the LGA775 instructions relate to LGA1156 installation and vice-versa. Fortunately this issue was easily noticed, as the retention backplate is labelled with the correct holes in which to place the adjustable threaded inserts. Once the correct instructions have been identified the process is quite simple (if a bit fiddly), and involves manually inserting the four metal-threaded inserts into the appropriate holes of the backplate and then attaching the backplate to the back of the motherboard using the supplied adhesive pads.
In addition to the aformentioned niggle and contrary to the supplied instructions, screws with two different types of thread were supplied, one type having a coarse thread and the other a fine thread. The instructions only indicate four scews are provided, not eight, and doesn't indicate which type to use. After a little checking, it was decided to use the fine threaded screws, as they seemed most compatible with the supplied adjustable threaded inserts. Once the correct screws have been identified, these are inserted into the appropriate hole in the plastic inserts, and clipped into the retaining ring the appropriate way around.
The retaining ring is then loosely attached to the retention backplate by turning the screws by around half a turn. Finally, the protective cap can be removed from the cold plate/pump unit, and it can then be guided through the cutouts on the inner-circumference of the retention ring and turned slightly clockwise or anti-clockwise until the grooves lock into place. At this point you should be able to let go of the cold plate/pump unit to screw it down, however, we found it needed to be held upwards against the retention ring until enough tension had been built-up between the ring and the backplate. This brings us onto our final niggle with the installation process.
Despite the instructions advising of the intial amount of turns to screw in the retention ring to the retention backplate, they don't advise of the approximate number of turns it will take to fully secure the cooler, but do advise you not to overtighten.
AMD CPU installation is very similar but slightly more involved as despite the instructions not mentioning it, removal of the factory-fitted retention frame is required before fitting the Corsair-supplied backplate.
Performance
| Corsair Hydro Series H50 - Thermal performance stock speed |
||
|---|---|---|
| System state | Idle | Load |
| Ambient temperature | 23°C | 23.9°C |
| Case temperature | 25.4°C | 28.8°C |
| Ambient/Case delta | 2.40°C | 4.90°C |
| CPU temperature | 28°C | 54°C |
| CPU/Case delta | 2.60°C | 25.2°C |
| CPU/Ambient delta | 5.00°C | 30.1°C |
| Corsair Hydro Series H50 - Thermal performance overclocked |
||
|---|---|---|
| System state | Idle | Load |
| Ambient temperature | 23.6°C | 24.2°C |
| Case temperature | 26.3°C | 30.6°C |
| Ambient/Case delta | 2.70°C | 6.40°C |
| CPU temperature | 35°C | 70°C |
| CPU/Case delta | 8.70°C | 39.40°C |
| CPU/Ambient delta | 11.40°C | 45.80°C |
Even though the Corsair H50 is effectively an entry-level water-cooling kit, the thermal advantage of water-cooling is still clearly demonstrated with the temperatures above.
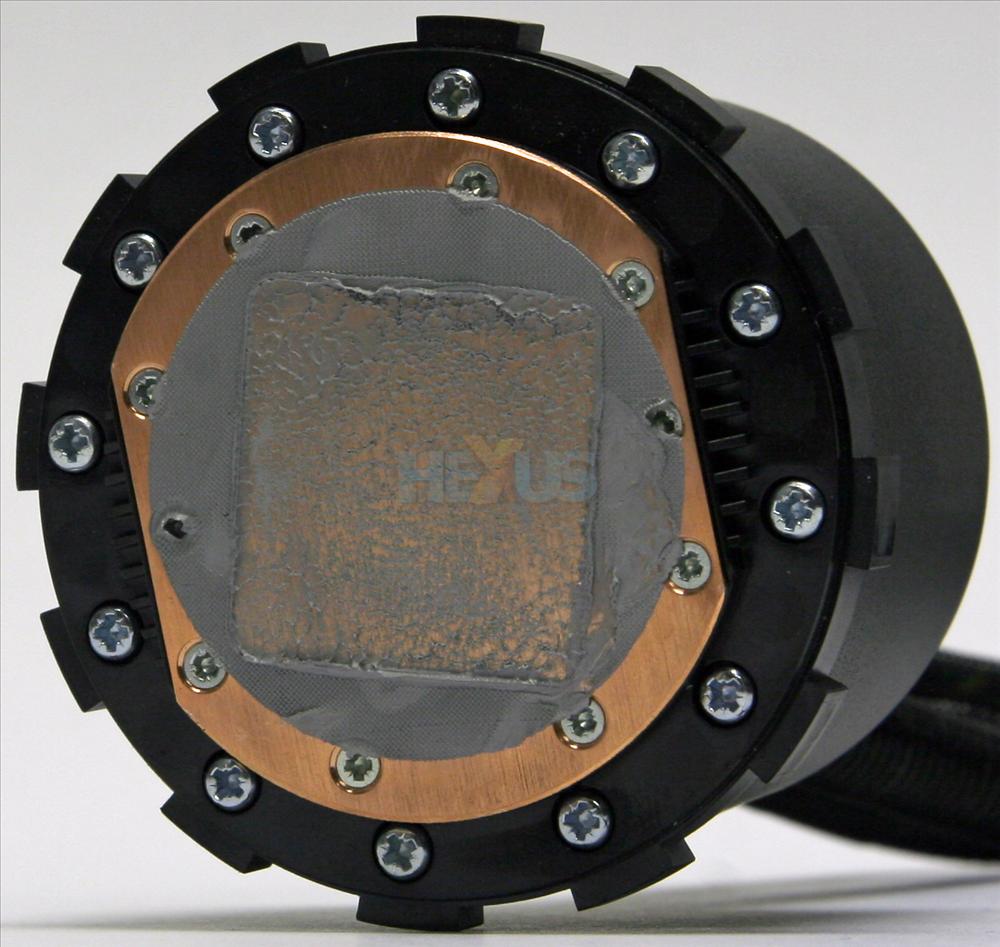
As with the Freezer Xtreme Rev. 2 the advantages of pre-applied T.I.M. are clear to see with a fairly even amount of grease having been left on both the CPU and the cooler itself. The eagle-eyed readers amongst you may have noticed the skewed impression the CPU has left in the grease on the cold plate. This represents the angle at which the retention backplate sat on the back of our motherboard.
In addition to running the fan as a cold-air intake, as advised in the instructions for best performance, we fitted the cold plate/pump unit so the Corsair logo was 90 degrees to the horizontal.
Therefore, because of this fan orientation, heat is vented towards the chassis thermal sensor, and CPU/Case delta temperatures will consequently look artificially lower than they should be. The focus, then, will be on analysing the CPU/Ambient delta's instead.
Contrary to how the system was configured when running the other coolers, the Q-Fan feature for the chassis fans was disabled when testing the Corsair H50. The pump runs off a three-pin fan header, and it's recommended to disable any fan controls on whatever header the pump is attached to. On ASUS' P7P55D Premium, there aren't seperate controls for each chassis fan header.
When the fan speed is controlled automatically by the Q-Fan feature in the BIOS, the Corsair H50 is fairly quiet and the fan runs at around 620 rpm, however once under load the cooler becomes slightly noisy with the fan running at around 1,320 rpm. If left to run at full speed, the fan ramps up to around 1,670 rpm and is quite noisy. If quiet performance is your goal, we'd recommend swapping Corsair's supplied fan for a quieter third-party model.


