Internals I

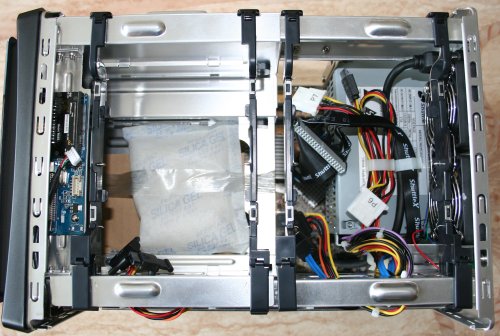
Whipping off the top by removing 4 thumbscrews and the fun really starts. Shuttle has designed the P-series chassis for tool-less assembly. Right at the very top, there's 4 drive rails that can removed by unclipping at the ends. Each rail fixes directly into special cut-outs in chassis, making a secure connection. The very height of the SD31P, at 220mm, allows Shuttle (and the user) to add in a couple of extra 3.5" drives. The drive rails need to be removed before the main tray can be accessed, though.

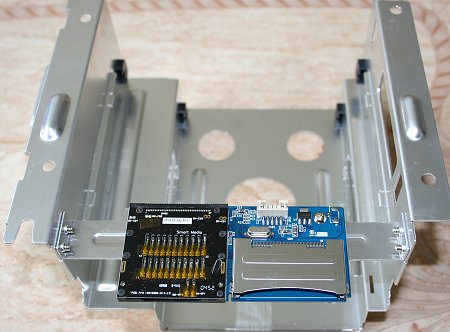
The tray holds a single 3.5" drive at the bottom and a 5.25" drive on top. The top portion is where the drives rail would affix into and hold another 3.5" drive, should the need arise. Also, you can see the innards of the 8-in-1 multicard reader.

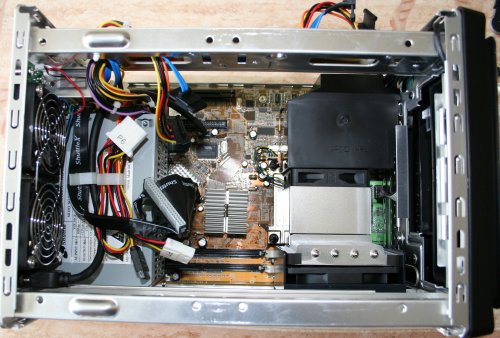
A look at the right-hand side shows how it all fits together. Note the drive rails at the very top and the PSU to the right. A duct on the left-hand side obscures the view of the CPU cooler. Air is sucked in from this side and exhausted out of the other. The very nature of the PCI-Express slots arrangement dictates that only video cards with single-slot coolers can be used without running into problems of card's heatsinks (dual-slot) tampering with the drive tray and duct inside, so it's generally a no-no to GeForce 6800 Ultras, for example. GeForce 7800 GTXs are also a little too long to fit into the SD31P without at least removing the ducting on the left-hand side.

Which brings us nicely to the 92mm fan on the other side, pre-affixed to the chassis itself. The air warmed by heat transfer from the CPU is pushed out on this side. Fortunately, Shuttle's SD31P BIOS allows for decent levels of fan-speed control. Handily, Shuttle also pre-attaches an IDE cable from the single ATA100 port and up to the probable location of the optical drive. In the foreground, we can see a couple of DIMM slots that house up to 2GB of DDR2 (240-pin) memory.

Here's the whole assembly as seen from the top, sans drive tray. The duct, CPU cooler, and large exhaust fan make up one continuous block. DIMM and expansion slots sit to the left.


