


A look inside
It's compact and sturdy from the outside. The guts of the system are accessed by removing two sets of two screws on both front and back of the Hydrocool. It's an extremely snug fit so removing the cover takes a little force. Also, the fan guards are attached to the acrylic via pushpins. These inhibit the easy removal of the cover.
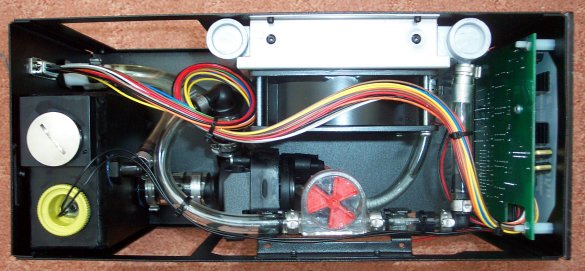
Here we're looking down at the internals from directly above the Hydrocool. Note that the reservoir is on the left, the pump, fan and radiator in the centre, and the electronics on the right, which are carried from the front to the serial port on the back via a gaggle of wires.
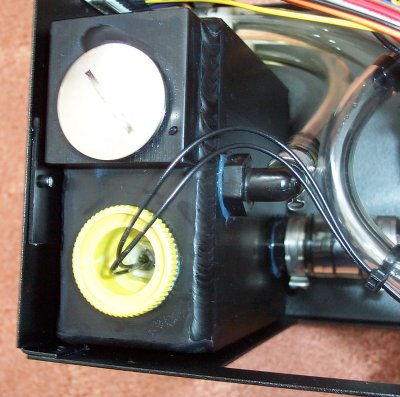
The purpose of this shot is to highlight the bulletproof nature of the reservoir. There's ample heavy-duty welding here, and the connection between the reservoir and pump is sound. Assuming the system isn't leaking on arrival, there's very little to go wrong. The yellow lid contains a water level meter which is connected to the electronics on the front. The unit begins beeping furiously if the liquid level is deemed to be too low.

The pump is another heavy-duty affair. You can almost see where Delphi's influence has been. The Hydrocool is designed to last for some time. Note how the pump isn't in direct contact with the bottom. This should alleviate some of the rattling and vibrations found on some models. And also note the rubber surrounding the pump, all with a view to dampening the noise output, we imagine.
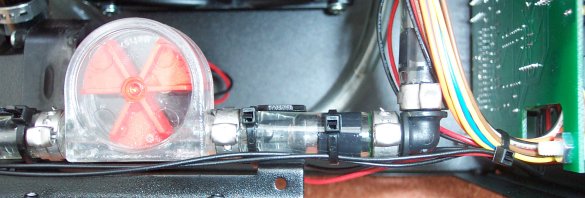
The Hydrocool features a flow meter to diagnose whether water is being pumped around the system or not. It's lit up once it gets going and can be seen through the case. A nice touch, but it doesn't help the design in any meaningful way. A small light, found underneath the flow meter, allows the meter to be seen through the acrylic cover.

Here we can see the massive 120mm (120mm x 38mm) fan sitting astride the radiator. The red turbo button the front, once depressed, rockets the fan up to maximum RPM and maximum cooling ability. The inside isn't as cluttered as you may think. A reasonable amount of thought has gone into component positioning.
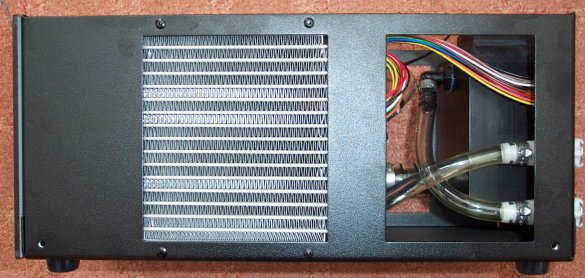
Here's the radiator in all of its glory. Like most of the other components employed in the Hydrocool, it's of high quality construction. There's plenty of heat exchange potential here with the array of fins. Even though the radiator isn't the largest available, Corsair reckon that it's good for up to 200w of heat removal. The two internal hoses are routed to the radiator and reservoir respectively. The process is CPU block (exit), tubing, radiator inlet, radiator outlet, flow meter (just for aesthetics), pump, reservoir, tubing, and CPU block. Decent components, decent construction and decent looks give it a good start.


