


Internals II
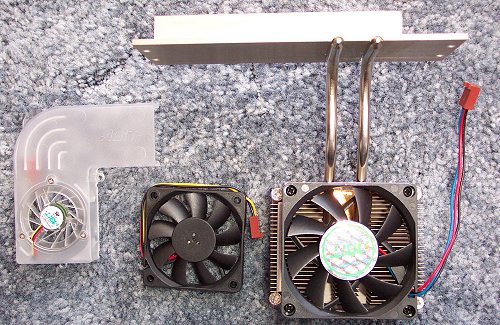
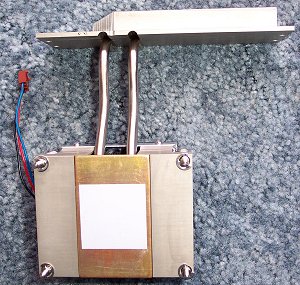
The cooling apparatus combine to form a novel system. The main CPU cooler uses established heatpipe technology to transfer heat up and away from the CPU's surface. The cooler mounts on to the PCB surface using four screws housed in springs that provide the appropriate tension. The large heatsink area fixes into the back panel. An exhaust fan and OTES fan that cools the exposed heatsink complete the cooling.
The cooler arrives with a TIM in place. You can see the four screws on each side. It can be a little tricky to get the screws nearest the PSU in. It all comes together with a little perseverance.
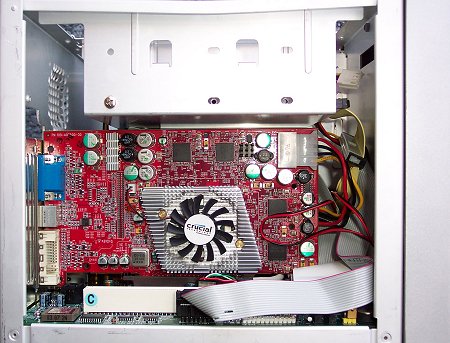
Finishing the DigiDice off is a matter of routing and placing the components in a logical fashion. It becomes claustrophobic with a medium-sized AGP card in place. The short IDE cables don't help matters either.
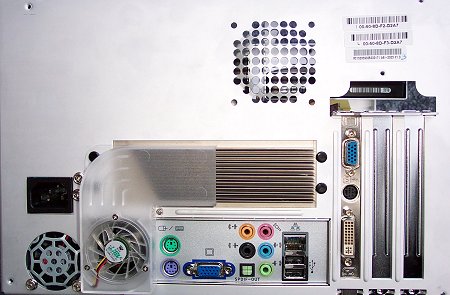
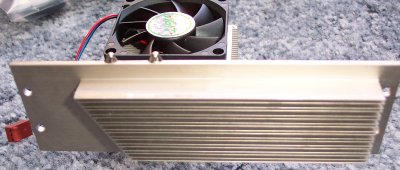
As you can see, the heatsink fits in around the cutout we spoke of earlier. The OTES fan fixes on above to provide some kind of active cooling. The exposed heatsink become almost burning to the touch, suggesting that it was working well. ABIT provides the necessary nuts, screws and paraphernalia to get everything working.
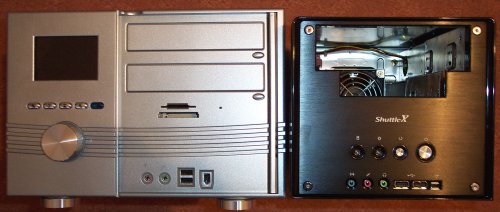
For comparison's sake, the DigiDice is sat next to a standard Shuttle SB65G2. The ABIT design is a lot wider, a little taller but a just a smidgen less deep. The Shuttle would win on the important build quality criteria. The DigiDice retorts with a stylish LCD screen. The market is getting saturated now, such that features peculiar to a certain company will prove decisive.


