Case Window
I had originally planned a window for this case but couldn't decide on just what kind. The normal round, oval and square ones have been done to death now and I wanted something different. I had decided to do a unique window with no window rubber at all.Now in order to not use any rubber I needed to be sure of two things. One that the edges were filed back precisely and find a way of fixing the perspex of the window in place. The first is fairly easy to do the second was much harder. The three ways I could think of fixing the perspex were:
- Glue
- Rivets
- Nuts and Bolts
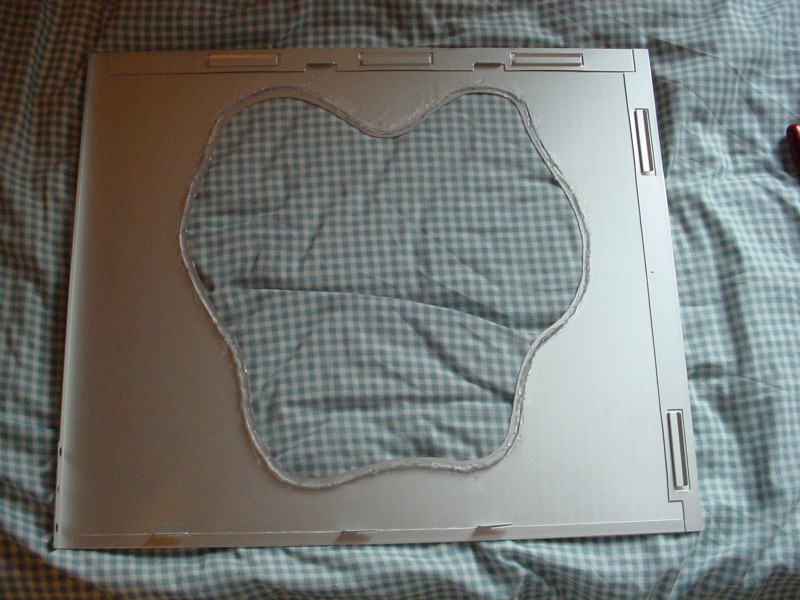
Next up the design, I wanted something original so I just drew out a ruff design and it looked good so I went with it. I drew the design onto the back of the side panel checking that nothing was obstructed.
The hard part is to cut out the shape, I use a dremmel with reinforced cut off discs. This goes through aluminum very well but its slow on steel so you maybe best using a jigsaw for that. I cut 2mm inside the line to give me some leeway. When the final shape was cut out I used the filing attachment to file back to the line to give a good edge.
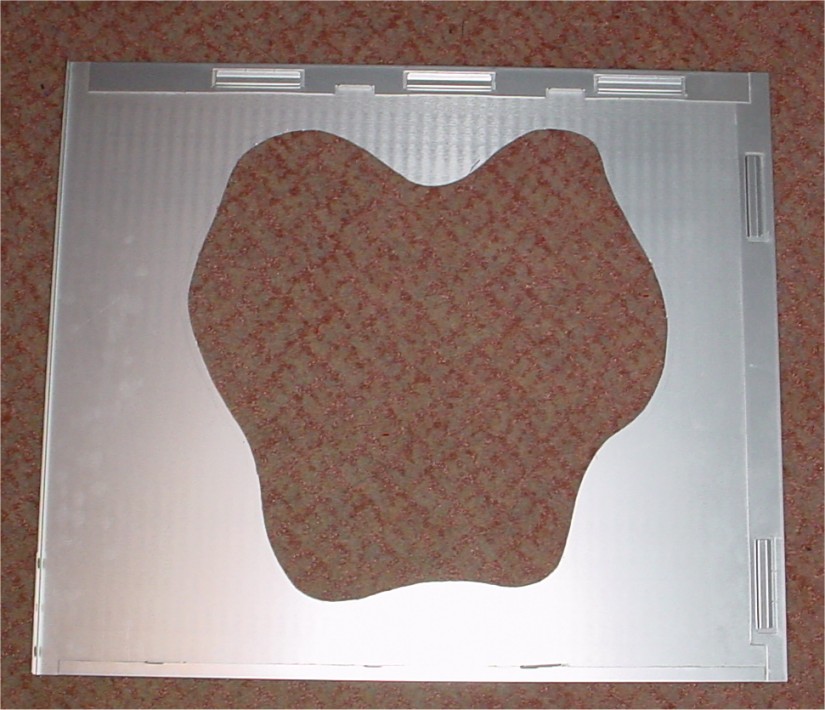
As you can see above the window cut out is finished and filed back. Next up is cutting the perspex to shape. Place the perspex on the back of the side panel and draw a line 1cm all the way round the cutout. Now cut round the line on the perspex (I would recommend a jigsaw as dremmels melt the perspex , of course I used a dremmel , its more fun :D). Just one more stage is need , and that's the gluing. You need a strong epoxy based glue, place a small amount the outside of the perspex cutout and then press into place. Leave it to dry overnight.