Getting up and running
Whether you're new to networking or not, configuring the LinkStation Pro is very, very easy.
Connect one end of the bundled Ethernet cable to the LinkStation Pro, the other end to your router/switch/hub, attach the power cable and flick the switch to the on position.
That's the first step, and you can then gain access to the unit's network storage by running the bundled NAS Navigator software - it detects any LinkStations on your network and provides one-click access to the pre-configured share folder.
Using your computer's operating system - the LinkStation supports Windows or Mac OS X - the share folder can be mapped as a network drive, and if you don't envisage any complicated usage scenarios, you can pretty much leave it at that. The same folder is used for the pre-configured DLNA media server, so you can dump all your music, videos and photos in sub-directories, but if you want tighter control over NAS functions, it's available through Buffalo's web-based admin panel.
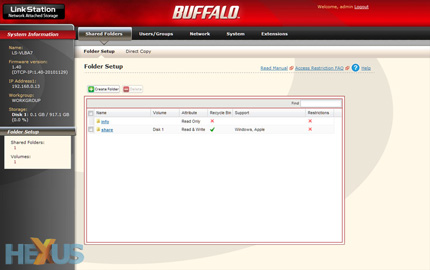
Accessed via the NAS Navigator software utility or by entering the LinkStation Pro's IP address directly into your browser, the admin panel lays out a collection of configuration options in a clear and concise manner.
The entry page, pictured above, provides the option to create new shared folders and change the default directory for the one-touch USB copy function. The latter, used in conjunction with a third-party USB storage device, allows the user to connect an external drive and copy all of its contents at the touch of a button.
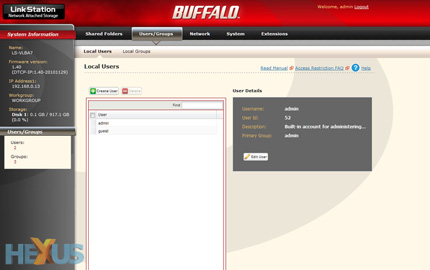
The second tab - Users/Groups - makes it possible to create multiple user accounts. What's handy is that individual users, or groups, can be given a hard-disk quota. Helpful if you don't want the kids' torrents eating up all of your drive space.
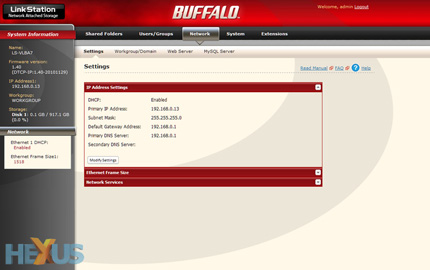
Moving over to the Network tab lets the user modify network configuration settings, as well as enable a handful of optional network services - these include an FTP client, a web server with support for HTML, CGI scripts, images, and JavaScript, and a MySQL database. Everything a budding networker needs to run his/her own website.
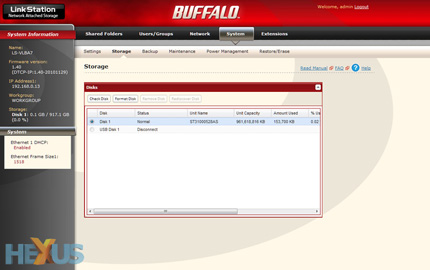
Digging deeper, the penultimate System tab provides a selection of useful tools designed to help keep the LinkStation Pro running smoothly.
From here, the internal hard disk and attached USB drives can be formatted (the former uses the XFS file system while the latter can be configured as EXT3, XFS or FAT32), email notification can be configured for hard-disk status reports, fan failure and disk errors, and backups can be scheduled. For the latter, the LinkStation Pro supports normal, append and differential backups to another LinkStation on the network or an attached USB drive.
Apple Time Machine support is also available, but there's sadly no option to backup to an online storage provider. The user can however choose to backup specific folders, and a backup schedule can be defined to run on a daily, weekly or monthly basis.
Should you have green concerns, a sleep timer is also available to wake the device and put it to bed at user-defined intervals. There's unfortunately no option to let the integrated hard disk sleep after a set period of inactivity, though.
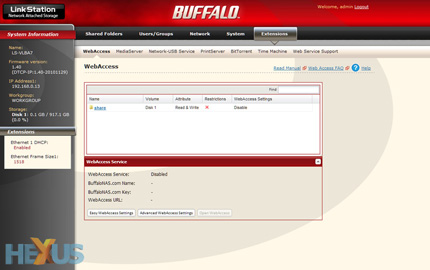
Last but not least, the bulk of the LinkStation Pro's additional functionality is configured via the Extensions tab.
In this section, WebAccess can be used to provide access to your stored content remotely over the web via a browser or through Buffalo's free iPad/iPhone apps, the MediaServer can be fine tweaked and the BitTorrent download manager can be used to oversee your download queue.
All in all, Buffalo's interface is very easy to use but it's also limited in what it can do. For example, with only one USB 2.0 port, users can't attach both external storage and a network printer, and there's of course no support for SuperSpeed USB 3.
Minor niggles aside, the LinkStation Pro ticks many of the right boxes for home environments. Question is, can it deliver on the performance front?


