Block and installation
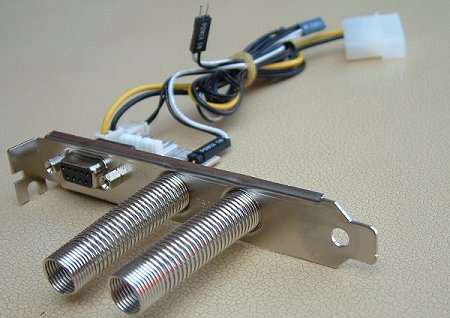
The serial cable links down to a controller card which, in turn, hooks up to the motherboard's power pins and block's temperature probe. Tubing is fed through the card's two springy holes and into the system. The extra, clear tubing in the package allows the user to hook-up further blocks to the system.
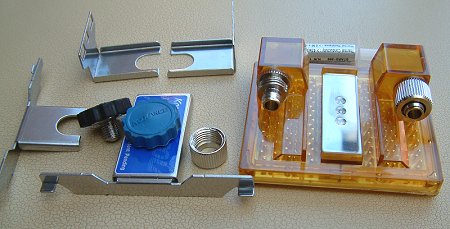
As mentioned earlier, blocks, be it CPU, chipset or hard drive, are optional extras and are sold separately. The review sample shipped with a CPU-300 CPU block, complete with attachments for S478/S462. The mounting mechanism is another exercise in excellent engineering. The block sits over the CPU's socket and two brackets slide into place on either side. Note the S462 brackets have the all-important 3 mounting lugs on each side. S478's simply slip into the CPU retention bracket's holes. The cooler is then secured on to the CPU by either a black or blue tension screw, depending upon which CPU is being cooled. The end result is a secure attachment that's easy to remove. Koolance also now has appropriate brackets for Athlon 64 (S754, S939, S940), LGA775 Pentium 4 and Celeron) and Xeon (Nocona & Prestonia) which, again, can be purchased separately.
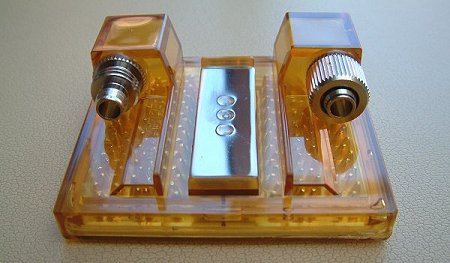
The tension screw pushed down into one of the holes in the central metal section. Pushing on tubing is easy here, too. Simply attach a clamp on to the tubing, attach the tubing to the block's nozzle and tighten up.
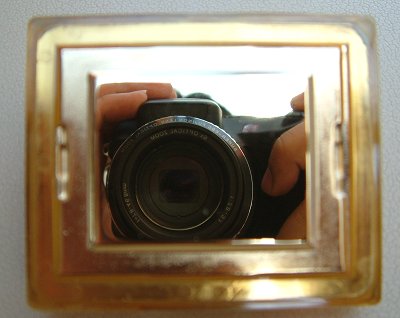
A coated copper block that's extremely shiny. In fact, it's a mirror-like finish, as the above picture clearly shows. You can attach the temperature provbe on either side, just where the hollow sections are.
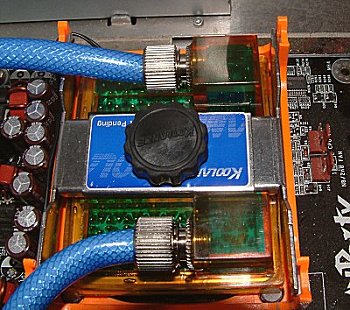
With the block in place over a 3.4GHz S478 Prescott Pentium 4. It really is a cinch to get into place, and is probably the easiest watercooling installation I've ever done. One could literally swap CPUs within a minute, making the kit ideal for users who frequently change processors and don't want the hassle of having to remove the motherboard each time.

Watercooling, by its very nature, can be hazardous. Koolance takes out the danger of a leaking setup by allowing you to operate the EXOS-AL kit without having it installed in a case. By shorting out pins 4&6 from the main ATX power connector, the system is kickstarted into action. That way, one can fill up the reservoir and let the liquid propogate through the system and any leaks can be identified and rectified before they cause problems.


