


Fitting
PreparationLike fitting one of Swiftech's air coolers, there's some motherboard preparation involved before you can attach the CPU waterblock. Mentioned before, you need to fit a set of 4 mounting bolts to your motherboard after removing the existing retention bracket. The mounting bolts are retained with nylon screw washers on the rear of the motherboard. As with their air coolers and more so with something like a waterblock which has extra mounting stress, it can be advisable to lock the nylon washer to the back of the board with a drop of super glue.
Preparation for fitting the GPU block means removing the existing heatsink on your card, in my case an MSI Ti4400, cleaning up the GPU and then applying heatsink compound ready for attaching the block. Swiftech supply Arctic Silver Alumina for both the CPU and the GPU and it performs very well and being non conductive it's perfect for GPU work.
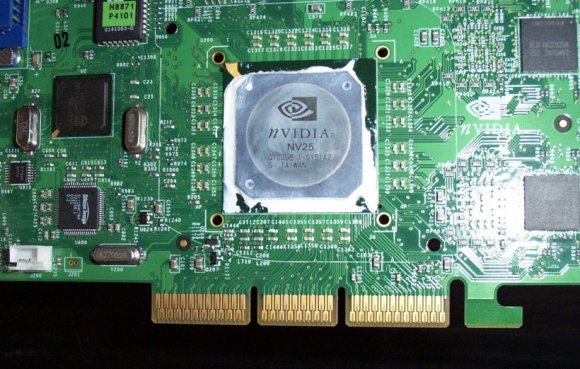
Removing the Ti4400/Ti4600 style of heatsink that was pioneered in the original reference boards is trivial. You remove a pair of spring loaded push pins (I used a small watch makers screw driver) by pushing through from the reverse of the board. Then after a little bit of cleaning you can clearly see the NV25 GPU.
After taking that shot I removed the rest of the existing thermal material from around the GPU core and further cleaned the core itself, then applied the Arctic Silver Alumina ready for fitting.
Fitting the blocks
After fitting your motherboard and inserting your prepared CPU, attaching the MCW462-U is easy. Align the block up with the mouting points on the motherboard (keeping hold of the block after alignment, it can squirm around due to pressure from the hoses pulling it) and then screw in each of the 4 spring loaded screws so they 'bite' and then in a crosswise pattern, screw them down until you feel them catch and get difficult to turn. A short, less than quarter turn after that is all thats needed to lock the block in place.
Fitting the GPU block after attaching the CPU block is a bit harder. With the CPU block in place, you have less say in where you can move the GPU block to in order to aid fitment. I found the easiest way was to use zip ties to hold the GPU block onto the core, manually adjusting it so alignment was perfect and then screwing in the four tiny spring loaded screws to the block. Manually holding the block in place without either someone to help you or zip ties to hold it down will take you forever (unless I've got no dexterity!) since the block will slip and slide over the GPU.
Then it's a matter of popping the graphics card into its slot and finally powering everything to test. You should end up with something that looks like this.

You can see the CPU block clearly and you can also see the four spring loaded screws on the back side of the GeForce4 Ti4600. Here's a GPU shot from the other side and you can also see one of the P4 brackets and the screws holding it down at the top of the shot.

The case and the prefitted nature of everything bar the waterblocks makes it very easy to hook up. The pipes are pre-routed, coolant is already in the system, pump and radiator are securely attached and the space in the case is generous to work in. I was a bit skeptical of the case, coming from my usual Lian Li, but things were fine in the end. It's well screwed together. Transplanting the hardware to another case is possible although since the price of the QuietPower system factors in the case and you can buy the blocks and other hardware seperately without the cost of a case, I can't see why you would want to.
So you're all fitted up, how is it going to perform? We'll look at CPU and GPU performance compared to air cooling them in a few graphs.


