


The Cooler and Installation
 |
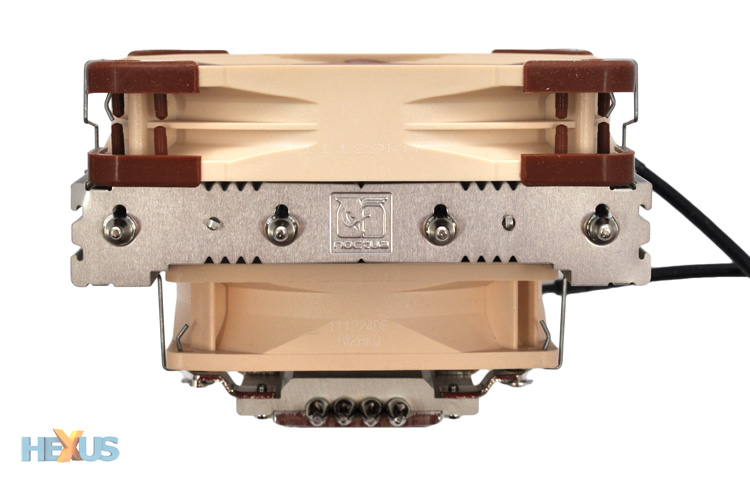 |
For those who appreciate a simple installation, it's worth noting that Noctua ships the NH-L12 fully assembled. The low-profile heatsink is attached to the nickel-plated base via four c-type copper heatpipes and two four-pin PWM fans are attached by default; a 92mm NF-B9 capable of speeds of up to 1,600RPM is sandwiched between heatsink and base, and a 120mm NF-F12 capable of hitting 1,500RPM sits on top.
This particular layout has been seen before - Noctua's own NH-C14 takes a similar approach to low-profile cooling - but the NH-L12 is noticeably smaller. The total package measures 93mm in height (compared to 130mm on the NH-C14) and if you still struggle for space, the top fan can be removed to lower overall height to just 66mm. Also useful to know that the top 120mm fan can be squeezed underneath the heatsink in place of the 92mm unit, provided you've enough space around your CPU socket.
 |
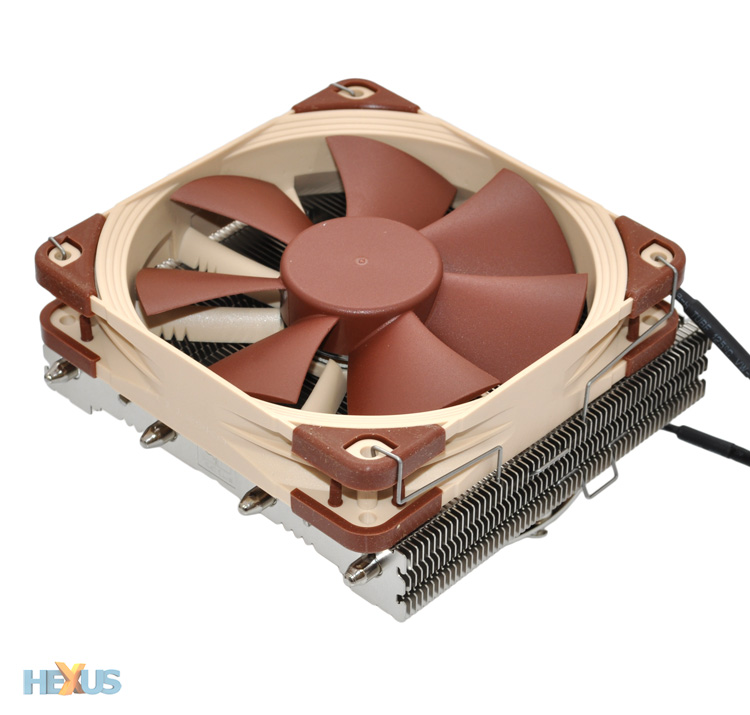 |
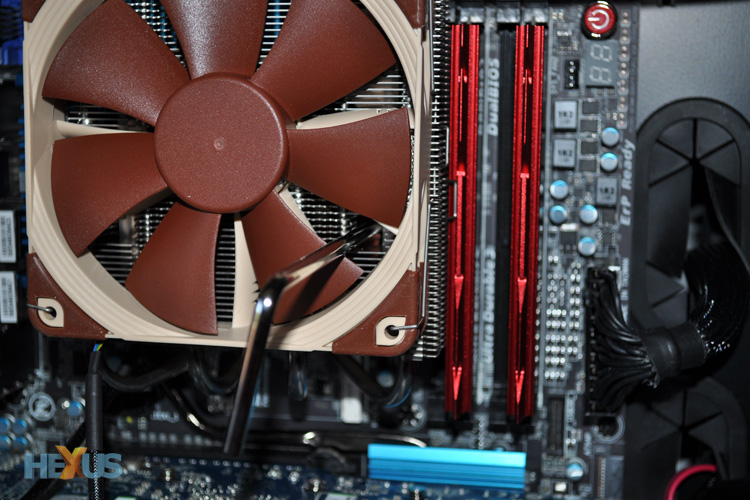
Build quality is good throughout, with the fans securely mounted and the contact plate neatly polished, but a few doubts linger. The cooler's compact size and top-down orientation won't aid airflow in a tower chassis - where air typically travels from front to back - and Noctua's beige-and-brown fans are still an acquired taste. We don't particularly care for them, and though we appreciate the fact that they're well built, we'd much prefer them in standard black.
The NH-L12 doesn't look quite as cool as it might have done, but it is nice and easy to install. On an Intel LGA 1155 platform, it's a case of attaching the backplate to the rear of the motherboard, fixing a pair of mounting brackets using four sets of screws and bolts, and then attaching the heatsink. You do need to apply thermal paste manually, but Noctua includes enough in the bundle to cover at least half-a-dozen re-installs, and installation can be completed from start to finish in under 10 minutes.
We like the fact that the entire cooler can be mounted without having to remove the fans - Noctua has kindly left gaps in the heatsink for the bundled screwdriver to pass through - but it's easy to run in to clearance issues with nearby components.
 |
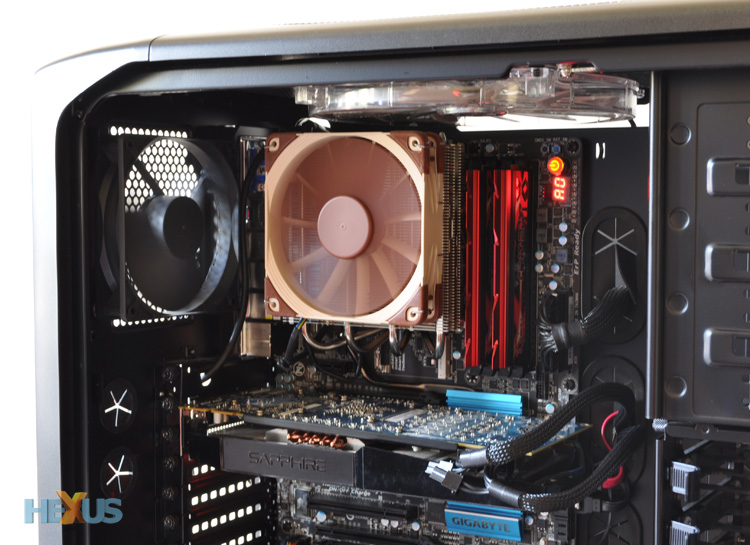 |
The cooler can be installed in various orientations, but Noctua does caution against installing the NH-L12 with the c-type heatpipes positioned at the top in a tower chassis as doing so may impede performance. In our experience, that isn't the only proviso. On our Gigabyte GA-Z77X-UD5H motherboard, we found it tricky to install the cooler with the heatpipes facing either left or right; the former would only be possible using low-profile memory modules and the latter causes the heatpipes to foul the first DIMM slot. To get around these potential issues, we mounted the cooler with the heatpipes at the bottom, leaving enough room for our pre-installed memory.
Installation can be tricky if you don't have a lot of room around the CPU socket, but being able to mount the NH-L12 in a choice of three orientations covers most usage scenarios. And, as shown by the pictured above, Noctua's top-down solution is comfortably shorter than many of the tower heatsinks on the market.
We'll see how this top-down design affects performance later in the review, but as with all recent CPU cooler reviews, we'll start by rating the NH-L12 on presentation, installation and aesthetics. Each category is scored out of five and we provide an overall percentage, too.
Presentation |
Installation |
Aesthetics |
 |
 |
|
 |
The NH-L12 doesn't score particularly well in terms of aesthetics - those beige/brown fans really aren't our cup of tea - but good presentation and an easy installation provide a solid total score of 73 per cent.


