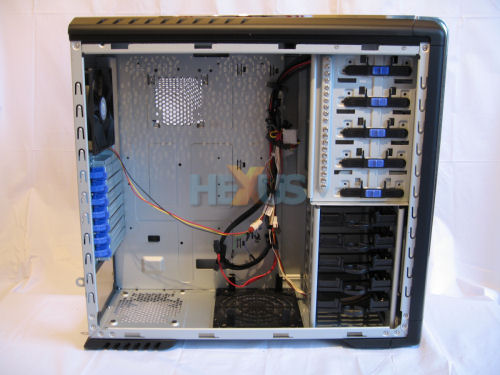
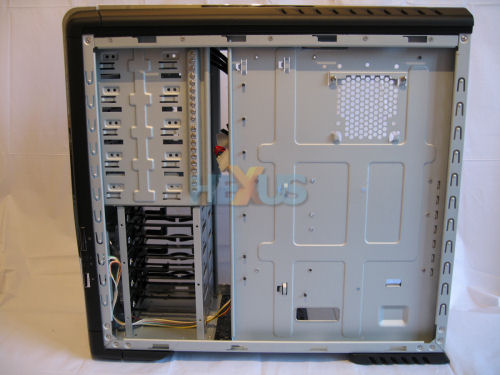
Inside - overview
The working side of the chassis is standard in many ways. However, unlike most cases, the 3.5in hard-disk bays at the bottom run from side-to-side, not front-to-back, and the space for the power supply is at the bottom and has at its forward end a filter and a 120mm fan bay.
Few if any tools are needed to add or remove expansion cards or drives but if the system is going to be moved around, some screws would help to keep everything secure, as we'll discuss a bit later.
The other side of the chassis has a small hole on the bottom of the motherboard tray to allow the routing of cables up the back to an opening at the top.
However, that top opening is cut off by the edge of the chassis, so fitting cable through the gap is a little difficult. In addition, taking the long way round will require the use of an adapter, since no standard PSU we know of has cables long enough to reach.
Even so, the lower opening on the tray can be used to route power and data cables to the hard drives which, unusually, mount into the trays connector-end first and need to have their wiring routed round the back.
That can be annoying as it means you need to remove the left panel to access the sockets on the hard drives. Fortunately, though, both panels are held on with thumbscrews, so the job is less painful than it would be if ordinary screws were involved.


