Using the AverTV USB 2.0
First of all, installing the AverTV is simplicity itself, as you would expect of a USB device. Simply plug it into a USB port, cancel the 'Add New Hardware' wizard, and then run first the driver and then application installation wizard from the driver CD provided. Et voila! No reboots required, you're ready to go within minutes.
Upon the first load of the software, you're prompted to select your country and run a scan to detect all available TV channels. You can elect either to do a channel scan using the pre-programmed channels in the software, or an all frequency scan. The normal scan should be sufficient and is very quick to complete, but the full frequency scan can take some time. With that done, you can then name the channels and order them as you wish, before hitting 'Finish' and finding yourself at the software's main user interface, ready to go.
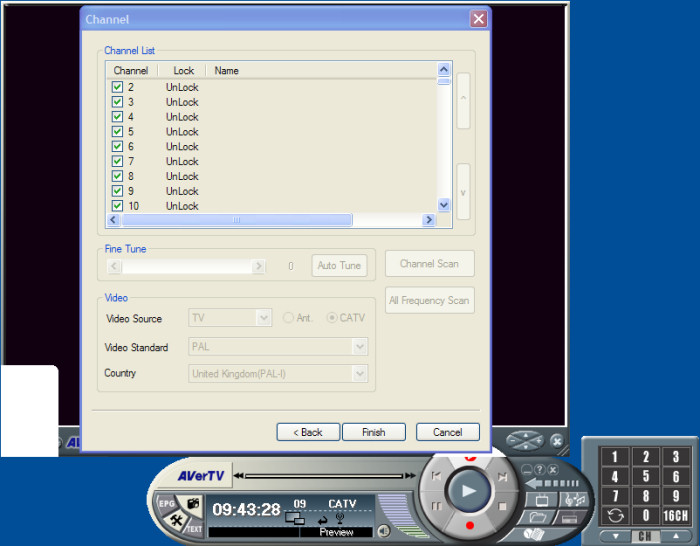
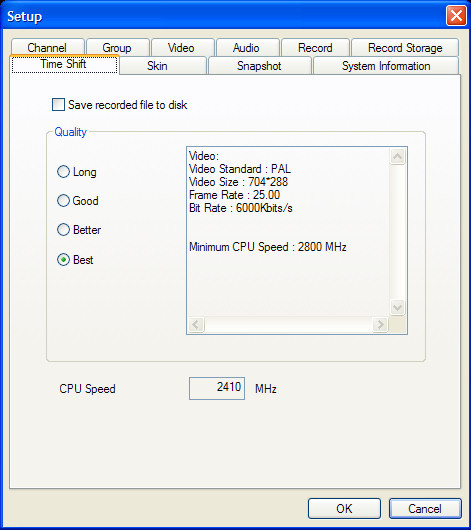
As you can see from the shot above, the basic interface is very much like that you'd see in any other media application, with options to play, stop, record, pause etc, as well as a set of controls to change channels and control the volume. The record button is used to make a video recording of whatever you are watching at the time, be it through the TV tuner, S-Video or composite connection. The recording can then be stopped by hitting the stop button. Alternately, you can hit the pause button to bring the AverTV's timeshifting function to life, allowing you to virtually 'pause' a broadcast, if you are leaving your desk for example, and then resume it from where you left off when you return. This is achieved simply by the AverTV streaming a recording of the feed on to the hard disk (So you need plenty of space free), and then playing it back to you when you hit play again. From this point you can also skip forward or back through the captured data, to avoid hearing the dreaded words "Calm down dear, it's only a commercial" for example. There are four different video quality settings available for the timeshifting feature, called 'Long', 'Good', 'Better' and 'Best'. Which of these you'll want to choose is dependant on both your CPU speed and hard disk size.
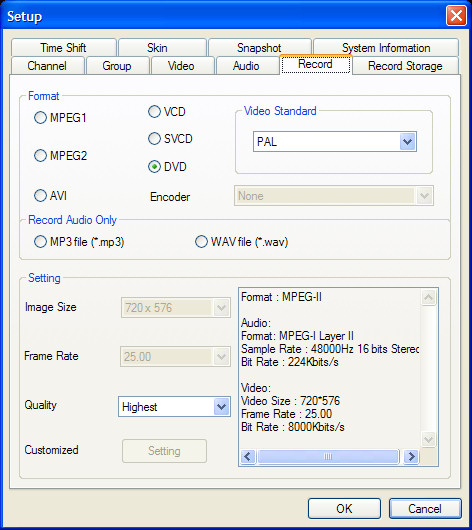
The standard recording features of the AverTV allows encoding into one of three formats - AVI, MPEG 1 and MPEG 2. There are also simpler options allowing to select simply VCD, SVCD or DVD quality, or even an option to record only the audio feed, in either mp3 or WAV format. You can also select image sizes and frame rates if you so wish. On the 'Record Storage' option screen, you can also select where to store your saved videos, how long to record for before stopping the recording automatically, and also where (if anywhere) to split video files, allowing you to record in a manner which will split a video into neat segments to be burned onto a DVD or VCD.