


BIOS
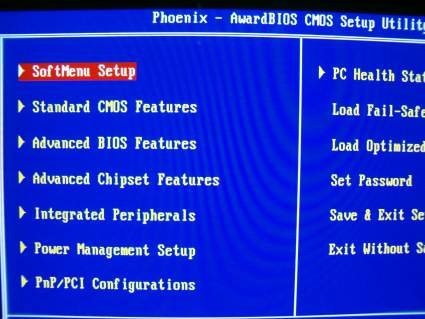
Thankfully any layout issues that ABIT may engineer into their boards don't carry over into their BIOS offerings. ABIT are past, present and probably future masters of the BIOS, sticking with AWARD and the traditional white on blue colour scheme for the AN7. ABIT's own board specific extensions fall under the banner of SoftMenu, on its third generation now, with the menu entry sat at the head of the lists you're presented with.The BIOS has an annoying boot splash screen that you can't turn off and the offer to press TAB to show POST information is largely redundant, given the speed the BIOS initialises. No sooner than the keyboard controller is setup and ready to accept keypresses to let you press TAB (or DEL to access the BIOS itself), than POST completes and you're whisked off to the SATA controller BIOS and onwards to your OS bootloader. It makes getting into the BIOS a tiring 'stab at DEL repeatedly so you don't miss the window of opportunity' exercise. The option to turn off the splash screen would be nice, in a future BIOS revision.
The SoftMenu selection gives you access to clock adjustment for CPU (front side bus speed and multiplier), memory divider to support your chosen memory modules, AGP bus speed selection and the voltage adjustment for CPU, memory, AGP and northbridge/SPP. ABIT are proud of their 5-bit FID (frequency ID) decoding in their Socket A boards, allowing full multiplier adjust on pretty much all Socket A CPUs, certainly recent Thoroughbred 'B' chips from the last year or so. The test XP3200+ was fully unlocked.
Since it's ABIT, the front side bus selection range and voltage ranges are prodigious, bordering on the insane. Thankfully for front side bus speed at least, you have the option of keying in a value directly rather than scrolling through any big list of values. Given that the range of frequencies goes this high, that's a good thing.
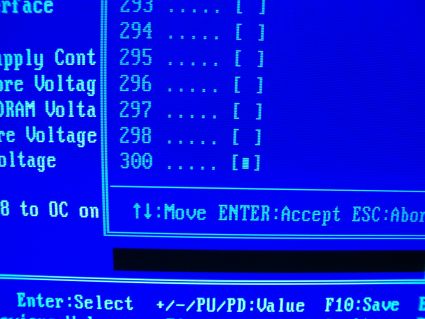
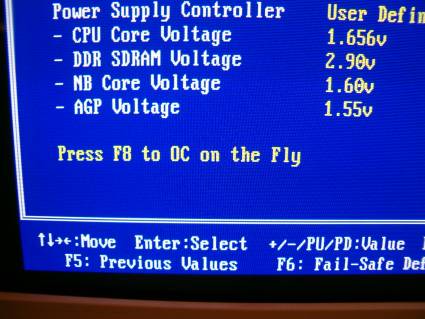
Voltage range on the CPU goes from CPU boot Vcore all the way to 2.313V, a near 0.7V spread. It's in ~0.03V increments, a bit much really but fine control never hurt anyone. Click here to see it. Memory voltage ranges from 2.5V, all the way to 3.2V, in 0.1V increments. Enough for even the most stubborn of memory sticks. Setting to 3.2V and giving my Corsair memory a mild heart attack showed just under 3.2V using Motherboard Monitor. 2.9V, my preferred voltage for overclocking endeavours with the same modules, was spot on 2.9V at all times, even under load. Not bad at all. Click here to see the range.
You get 1.6V to 1.75V Vddq (chipset voltage) adjust, should it offer you some performance increase when overclocking. Personal testing shows, with the latest nForce2 Ultra 400 SPP bridge steppings, that 1.6V (stock Vddq) is optimal, but your mileage may vary of course.
Finally for the SoftMenu section of things, pressing F8 lets you overclock on the fly.
In theory, it sets your chosen clocks and voltages for you instantly, allowing you to drop out of SoftMenu and go check voltages and temperatures in the health monitoring BIOS section, to see if things are OK before proceeding. In practise however, using the shipping BIOS, it never worked unless I was adjusting something only one or two steps away from the settings the board booted at. It was no use for booting at 2.2GHz/1.65V/200MHz bus and trying out 2.4GHz/1.85V/220MHz bus, without testing anything in between. The board would hard lock at that point, forcing a reboot. Not a redundant feature though, it works for testing incremental overclocks.
For the rest of the BIOS, it's pretty standard stuff. Advanced Chipset Features gives you access to the rest of the performance related settings, most of them memory latencies. The photograph shows the benchmarked latencies of 2-2-2-6, correctly detected by the BIOS using the SPD EEPROM on the modules.
The PC Health Status section is the last section of any note. Another BIOS high point, it allows you to monitor the hardware on the board and also adjust fan speed settings using FanEQ. It's part of the µGuru implementation, the software can adjust the settings from Windows too.

Finally, there's auto shutoff if no CPU fan is detected or it drops below a certain speed and auto shutoff if things get to toasty, both standard board protection features that everyone needs to offer in their BIOSes.
You need to set FanEQ settings intelligently, put your high and low temperatures too close together and too focussed on your usual CPU temperature and your fan will spin up and down its RPM range all day, driving you crazy. A wide range and use of the entire voltage range available delivers best results in this reviewer's experience. Adjustment using µGuru is a boon, meaning you can hand tune the settings in Windows, while actually doing meaningful work on the PC, for best results. More on that later.
BIOS Summary
Overall, the BIOS is something that ABIT do very well. SoftMenu, the AWARD BIOS base for good, easy to navigate adjustment and the good range of extras you get with FanEQ and the added µGuru stuff, makes for a good BIOS. The only niggles are the splash screen and limited window of opportunity for getting into the BIOS itself.An AN7 high point.


