Externals I
I had mixed views as soon as I opened the box for the SilverStone TJ-03. Part of me was screaming with joy as the case looks absolutely stunning, but as I lifted the case out of the box it didn’t have the same feel as a Cooler Master case. It’s hard to put it into words, but when you buy a Cooler Master case it feels solid and very sturdy. I’ve owned my CM201B for around 2 years now and it still looks as well as it did when I first got it. The TJ-03 leaves doubts in my mind as it didn’t have this feel of quality and sturdiness. The side panels seem to flex a lot and require a bit of strategic movement in order for them to fit. I’ve noticed Lian Li cases suffer from the same problems but the TJ-03 is basically a Cooler Master, so why am I noticing this lack of solidity?I’d imagine a lot of the flex in the side panels is due to the shear size of them, as this case is able to accept an extended ATX motherboard, which means the depth of the case is a lot larger than the standard Cooler Master 201.

I mentioned earlier that the case has 6 x 5¼ inch drive bays. These are covered by an aluminium door. Some computer cases have doors to hide the 5¼ inch devices and are often frowned upon by some computer users. You either love them… or hate them. I personally don’t like them as I access my CD drives quite often. There’s nothing worse than ejecting a CD within Windows and realising the case door is closed, to hear your CD drive attempting to push the door of the case open. The door is held shut by 2 magnets.
SilverStone have got the strength of the magnets spot on. They aren’t too strong that you struggle to open the door and aren’t too weak that the door opens by itself when the case is moved about. It is also possible to have the door of the case hinged on the opposite side as the holes are predrilled for the magnets and the door/case has also been engineered to accept the hinge on both sides.
The default setup is to have the door hinged from the right hand side. The side the door is hinged on has always been a big issue that I look at when a computer case is released. It makes perfect sense to have the case door hinged on the right hand side as most computer cases with window panels are on the left hand side of the case. This means the computer case will usually be positioned on the right hand side of the desk allowing the user to view inside the case. With the computer case positioned on the right hand side of the desk it gives easier access to the drive bays as the door opens away from you.
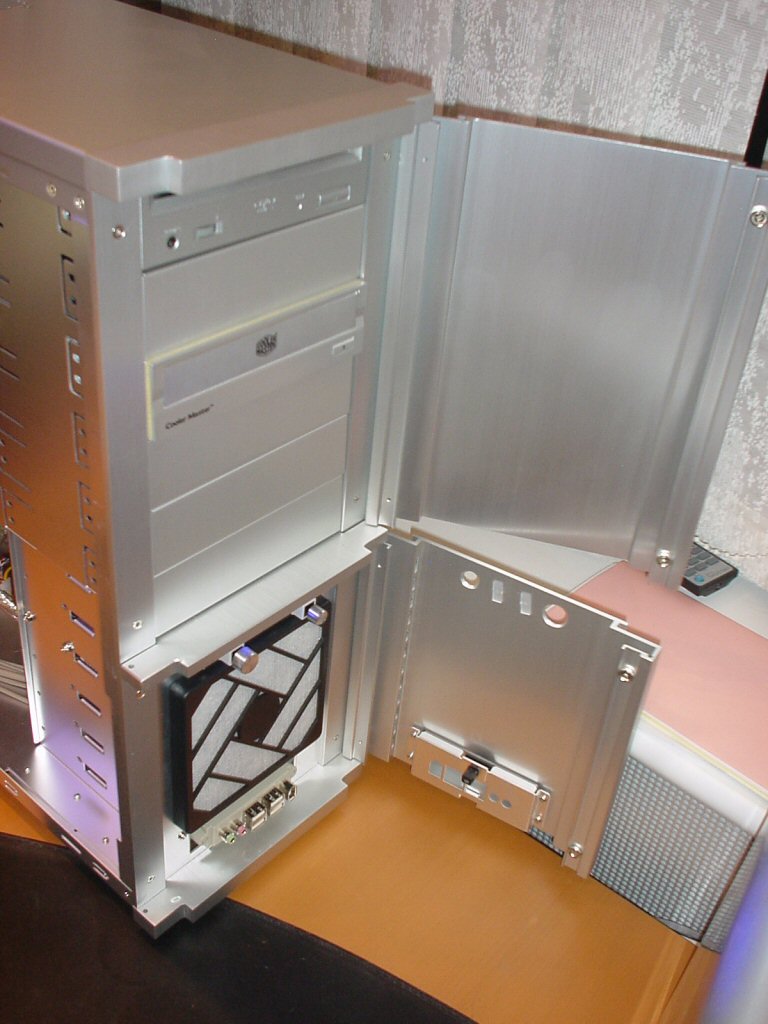
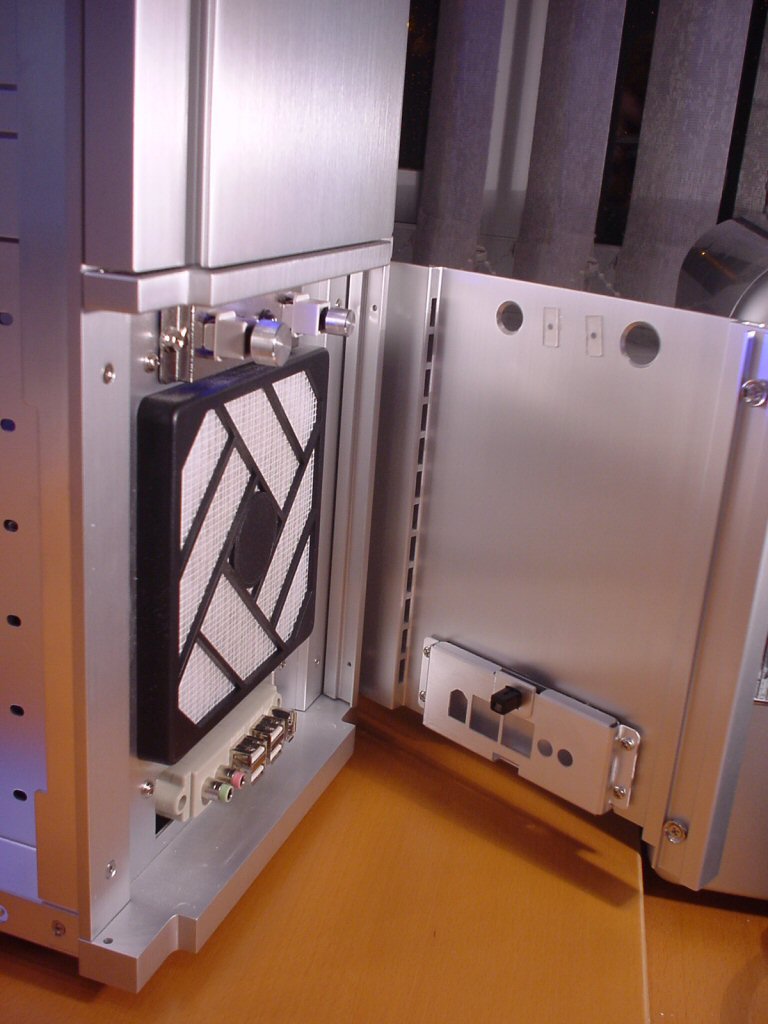
Underneath the main door for the drive bays is another door. Yet again, this door can be disassembled and hinged on the opposite side if you wish. The door hides the front intake fan. The fan is actually a massive 120mm fan which intakes cool air and pushes it directly across the hard drives mounted in the 3½ inch drive bays. Although the fan is 120mm, it is blocked by the aluminium door. This isn’t a major problem as the door has ventilation grills in the side to allow cool air to enter the system. Of course this isn’t as efficient as a meshed front but it allows the case to keep its sleek uniformed look throughout the front of the case.
Behind the door is a fan grill that prevents any unwanted dust entering the computer system. This can be easily cleaned by unclipping the black housing and removing the filter panel. Just above the filter is the power and reset buttons, along with the activity LEDs. The power and reset buttons protrude through the lower access panel when the door is closed. One problem I have with this is if you open the lower door to access the fan filter while the PC is turned on, you can actually reset the PC when you close the door. This is because the buttons are turned out of aluminium and have small grooved marks which prevents the door from slipping over them and back into its usual position.
In between the 2 buttons are the activity LEDs. These are the usual blue coloured LEDs which are nice to see on a case of this quality. When the door is closed the LEDs are diffused through plastic lenses. These lenses ensure that the LEDs are not too bright and overpowering.

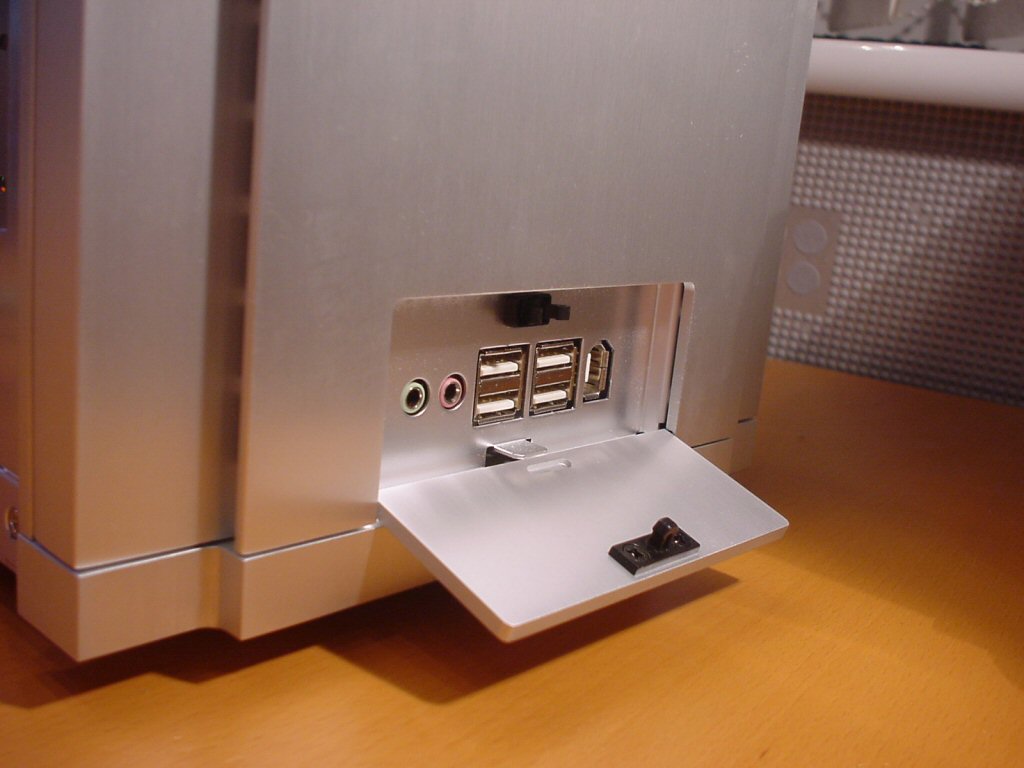
Further down the door is a small access panel. This is accessible by pressing the panel inwards and the flap folds down to reveal the expansion ports.
- Microphone
- Headphone
- 4 x USB 2.0
- 1 x 6 pin IEEE1394 firewire