


Little box of tricks
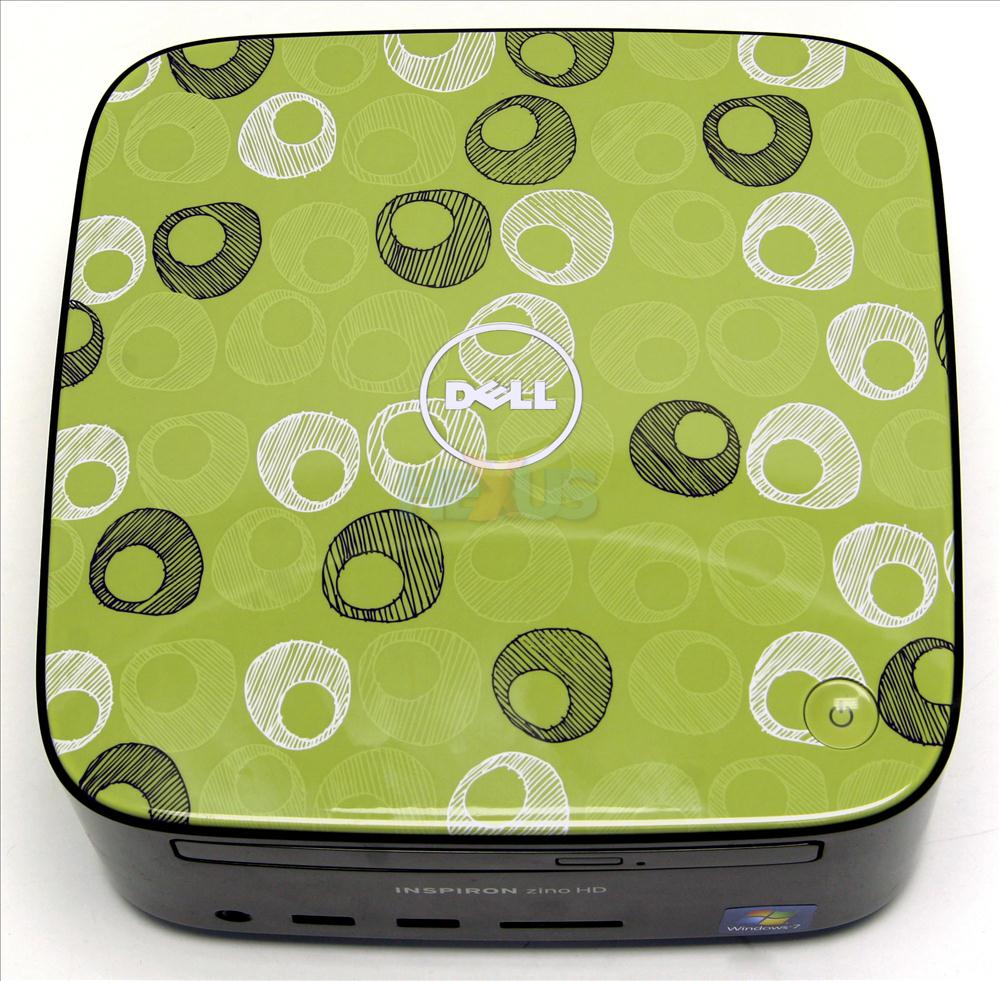
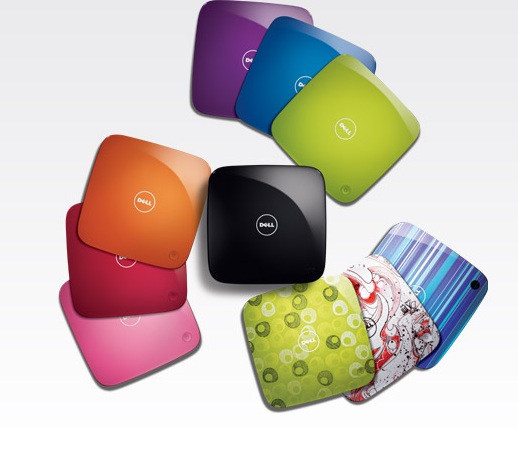
To gain an idea of size, the AMD-powered Inspiron 400 Zino HD is significantly smaller than an Xbox 360 console. Shipping from £279 with a boring black cover, Dell's first option is to enable customers to choose one of nine additional colours for the easily-removeable lid that includes the power button on the bottom-right side. As with most extras, you will have to pay £20-£30 for the privilege of customisation. That's a little steep in our opinion.
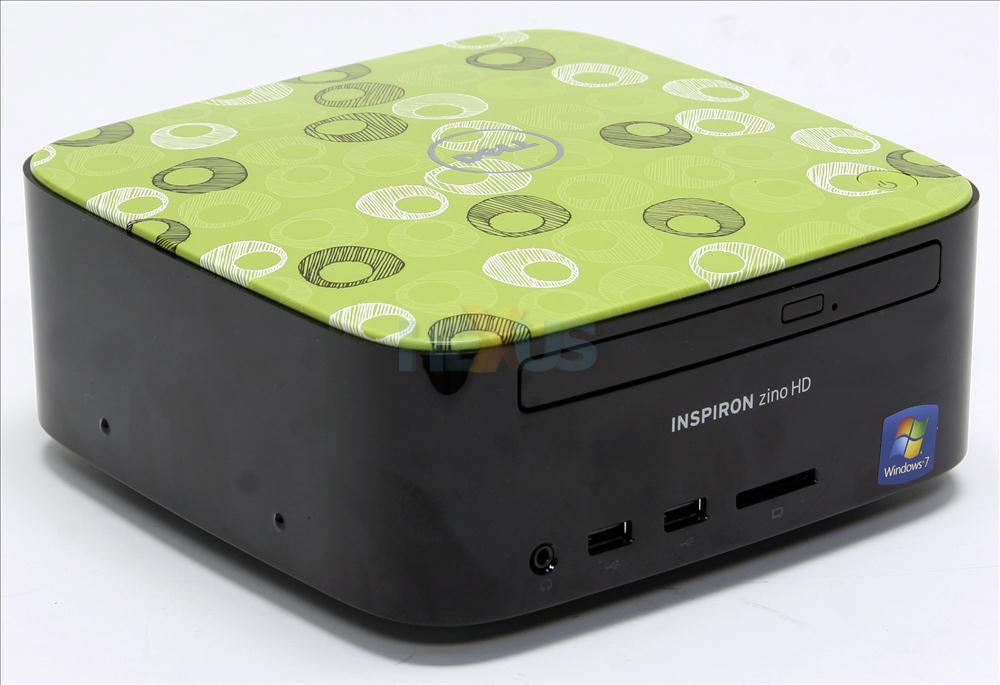
The front is lined with a slimline optical drive - 12.7mm in height and customisable from an 8x DVD-RW through to a Blu-ray ROM model - two USB 2.0 ports, headphone connector, and a 4-in-1 reader for the most common formats. An IR receiver, to enable a remote, is conspicuous by its absence.
Build quality is good. There are no rattles or squeaks from the unit and, whilst it is clear that plastic has been used in abundance, the Zino HD doesn't feel particularly cheap.
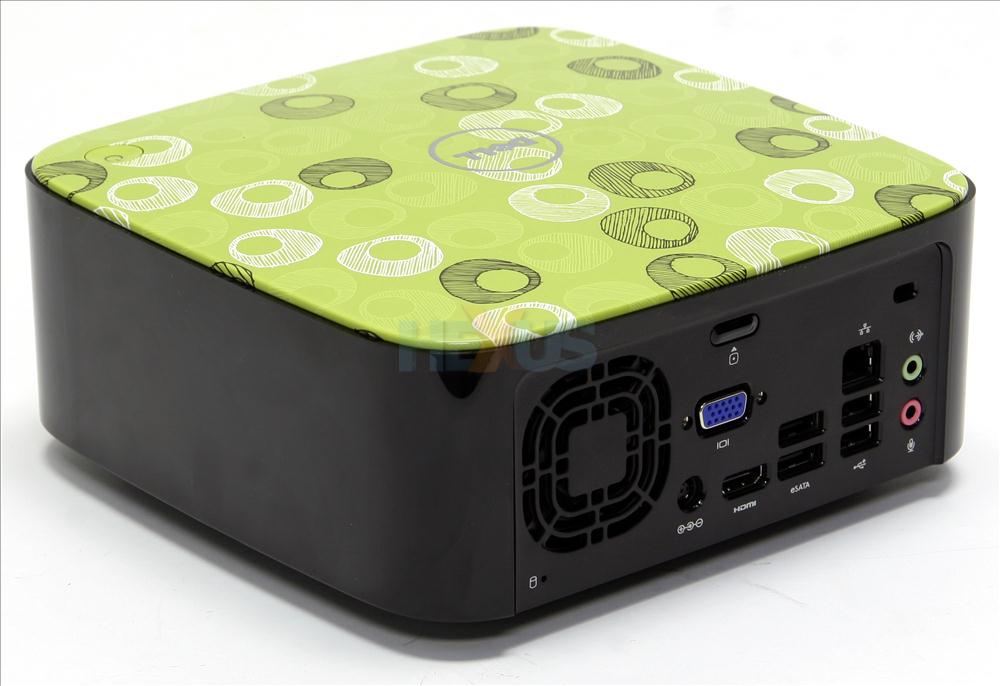
The back of the machine is busier. Dell adds in venting for the internal fan on the left-hand side. Connectivity is above average, because the Zino HD ships with HDMI and VGA as video outputs together with two USB 2.0 and two eSATA ports for high-speed peripheral connectivity.
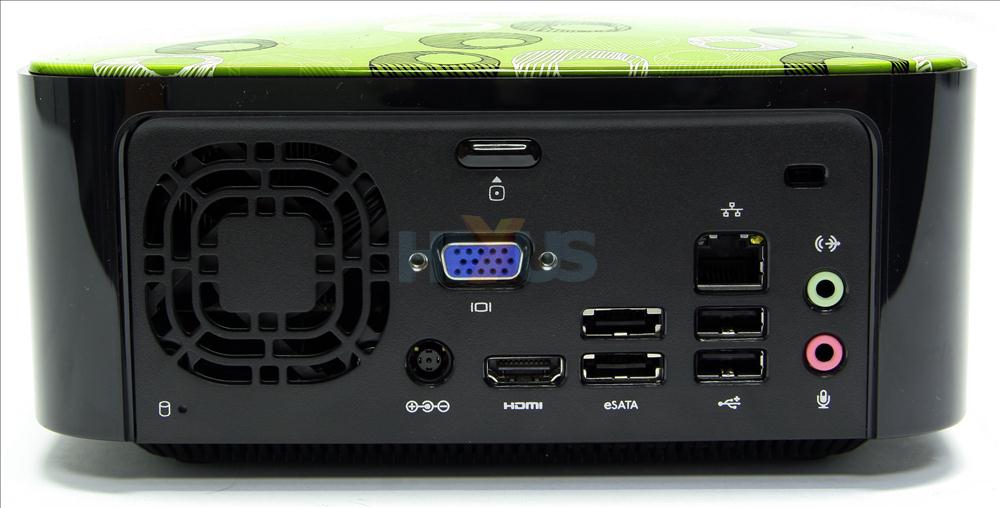
Then there's the usual Gigabit LAN, audio ports, and input jack for the power. Dell sensibly decides against housing the PSU internally and, much like notebooks, ships the Zino HD with an external power brick that's rated to 75W.
The external appearance and ports' arrangement is fixed; you cannot add additional connectivity at the time of purchase. Pricing, which varies greatly, is based on what's inside.
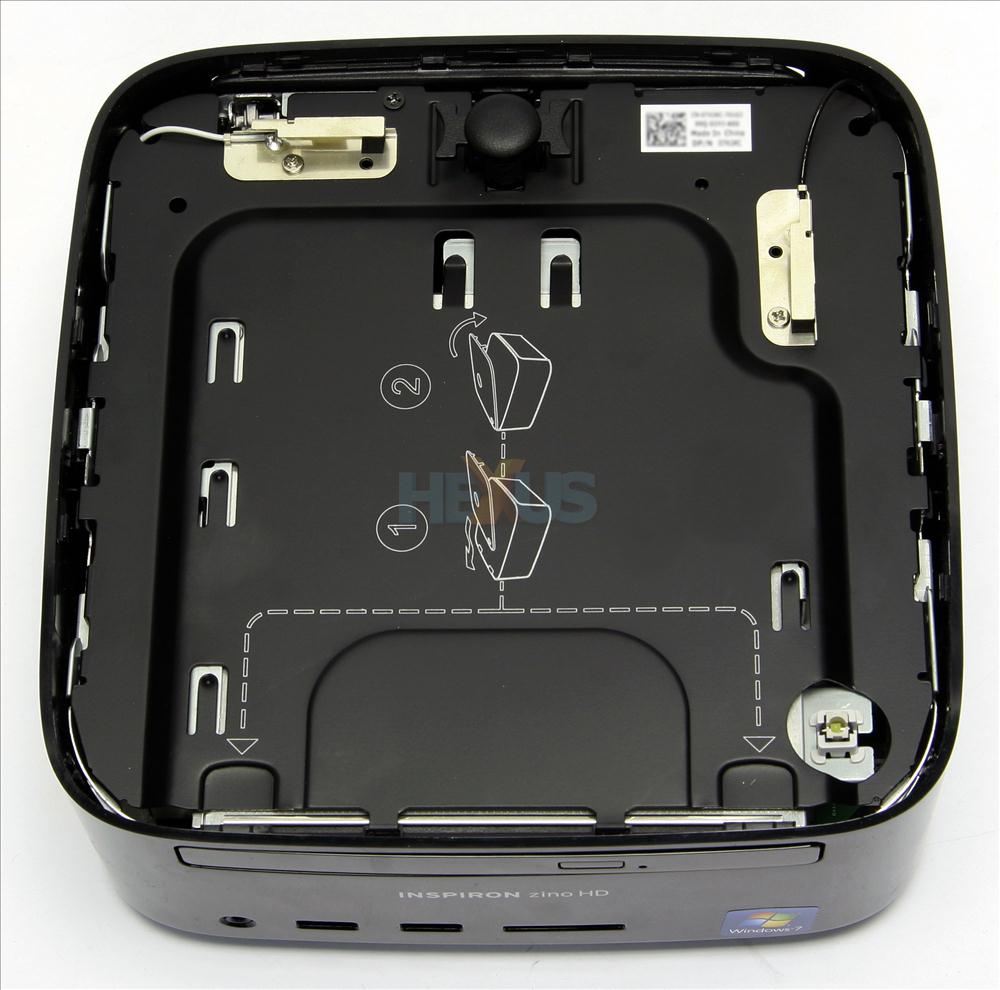
The first peek inside is by removing the lid. Simply press the rectangular button just above the VGA port on the back and the top pops off. Dell makes it relatively simple to access the actual components, listed in a guide, here, and the first step involves removing the screws that hold on the WiFi antennas (802.11b/g specified on this sample) and then the internal cover itself.


