


Inside the Node 202
HTPC cases tend to require a little figuring out, however the Node 202's component limitations are such that hardware installation is relatively straightforward. Though, there are a few subtle nuances to be aware of. The first is getting inside the case, which awkwardly requires flipping it upside down and undoing four screws on the base of the enclosure. Take out the screws, turn the case back over, and the top panel pulls away.
It's at this point that the chassis' £65 price point is put into perspective. There's a lot of plastic surrounding the steel central frame, and though build quality is reasonable, it's by no means exquisite. The Node 202 would have had to have been constructed entirely from metal to offer a more luxurious feel, albeit at a much higher price. What we have instead is a compromise: the chassis feels lightweight and cheap in places, but it doesn't look it and once fully assembled has the enviable trait of appearing more expensive than it actually is.
 |
 |
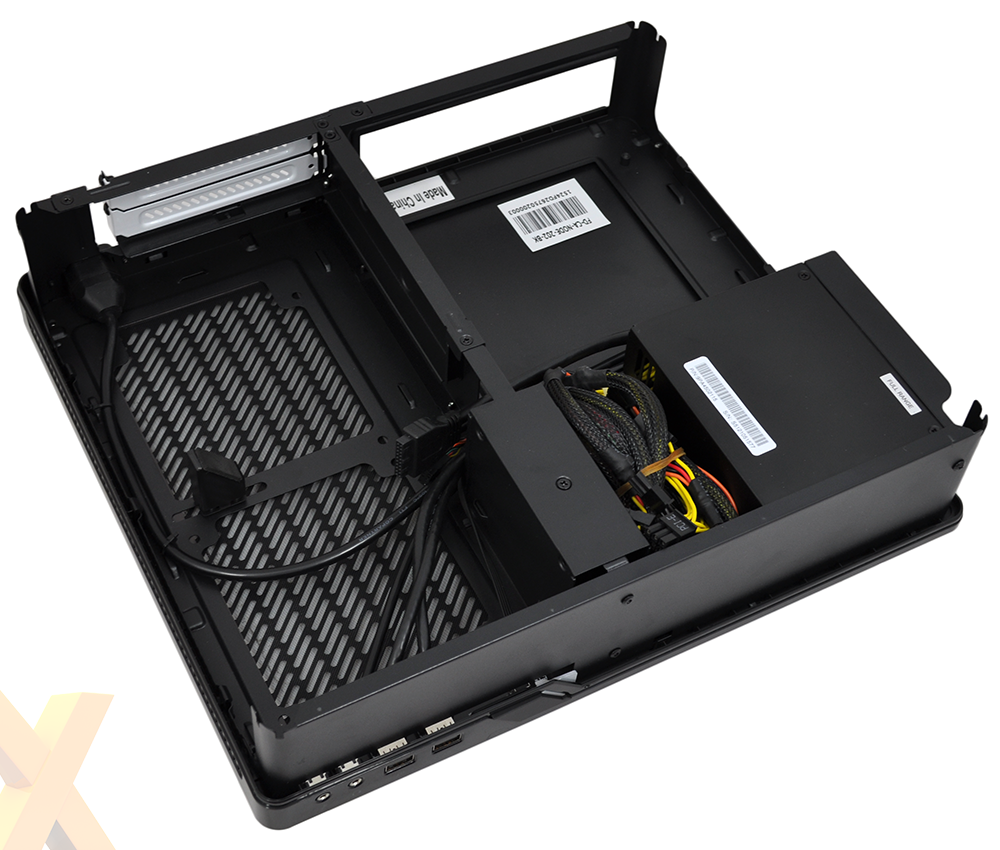
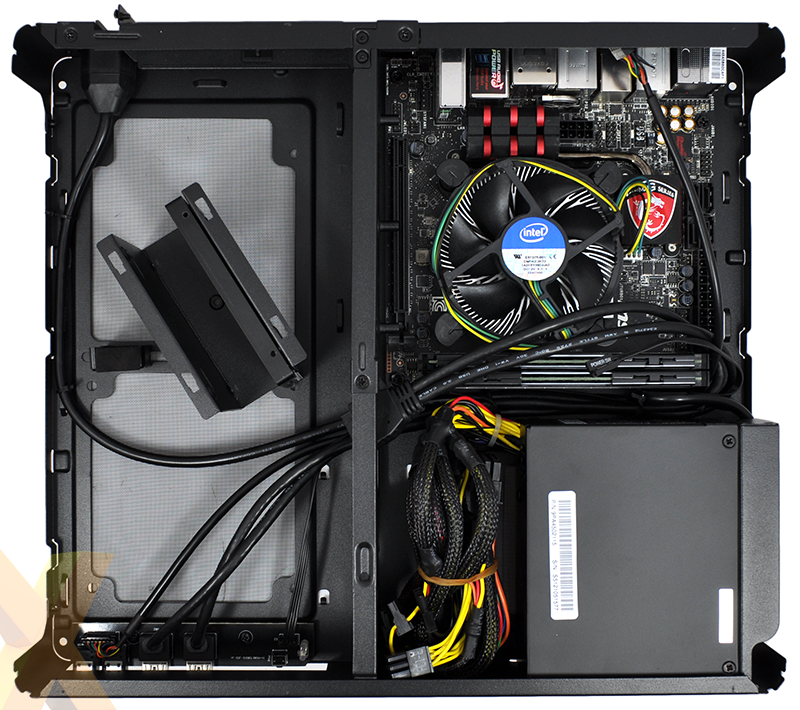
With the lid removed we can see a logical internal layout. Our review sample includes the 450W SFX PSU in the bottom right corner, next to a made-to-measure tray for a mini-ITX motherboard. A central dividing column includes a small housing for up to two 2.5in drives, and in the adjacent area there's room for a graphics card with maximum dimensions of 310mm (L) x 145mm (H) x 47mm (D). A good-sized hole allows cables to pass from the left cavity to the right, and the theory is that separating the CPU and GPU components should help the system keep cool.
Another thing you'll notice is that, aside from the fan integrated into the PSU, the Node 202 doesn't ship with any pre-installed fans. Indeed, fan mounts are at a premium, with only two available. They're positioned on the bottom of the graphics-card cabin and could house two optional 120mm fans, though you'll need to keep an eye on dimensions - using 25mm-thick fans limits GPU width to 35mm. In the fanless out-the-box configuration, a graphics card designed to exhaust hot air out the back of the enclosure would likely work best, as there's no contributing airflow.
 |
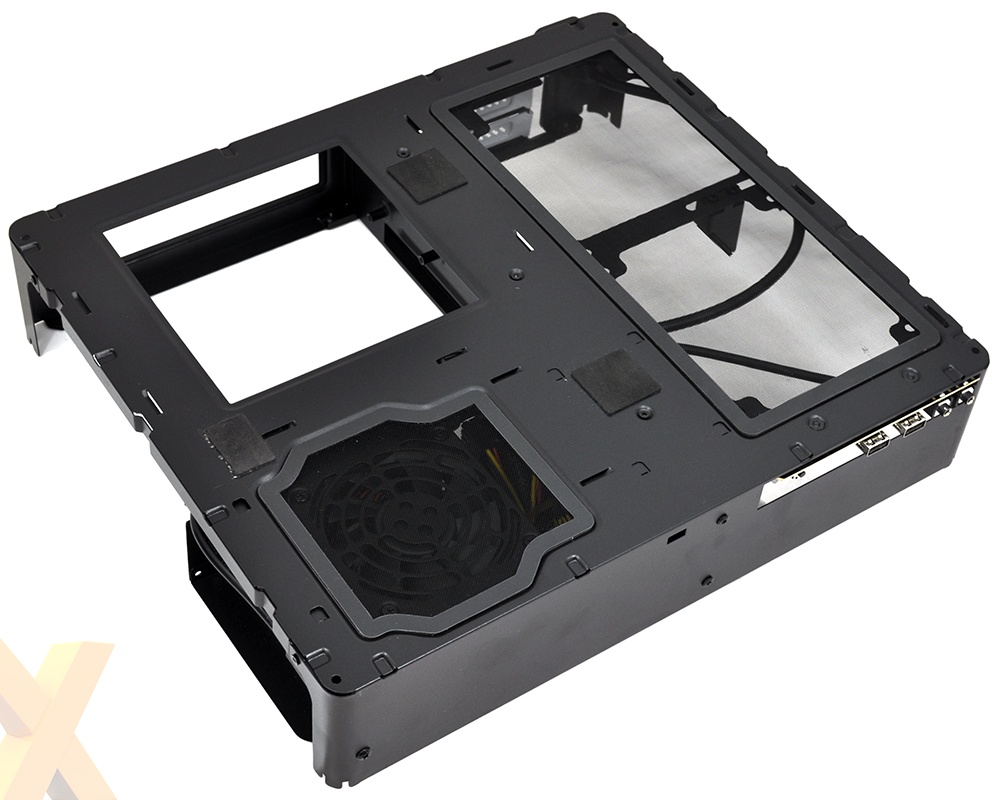 |
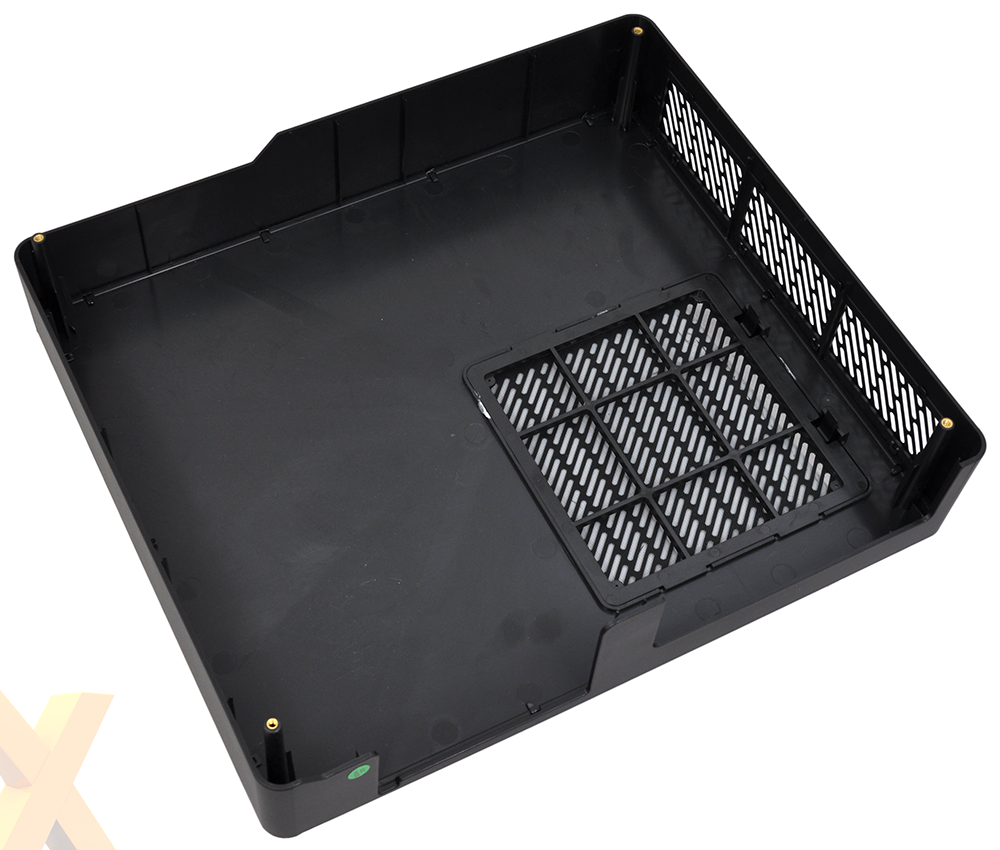
Given the lack of built-in fans, and the numerous air vents scattered around the chassis' body, we suspect dust build-up will prove to be a long-term problem. Fractal has attempted to allay any such fears by including three dust filters, but none are easily accessible. The clip-out plastic filter above the CPU can only be removed after the chassis top panel has been taken off, and in a similar vein the magnetic filters lining the underside of the PSU and graphics-card cabins are sandwiched between layers and can only be retrieved by unclipping the bottom panel (pictured above, left). Do so with care, as the various plastic clips holding the bottom panel in place aren't the strongest - we've already managed to break one.
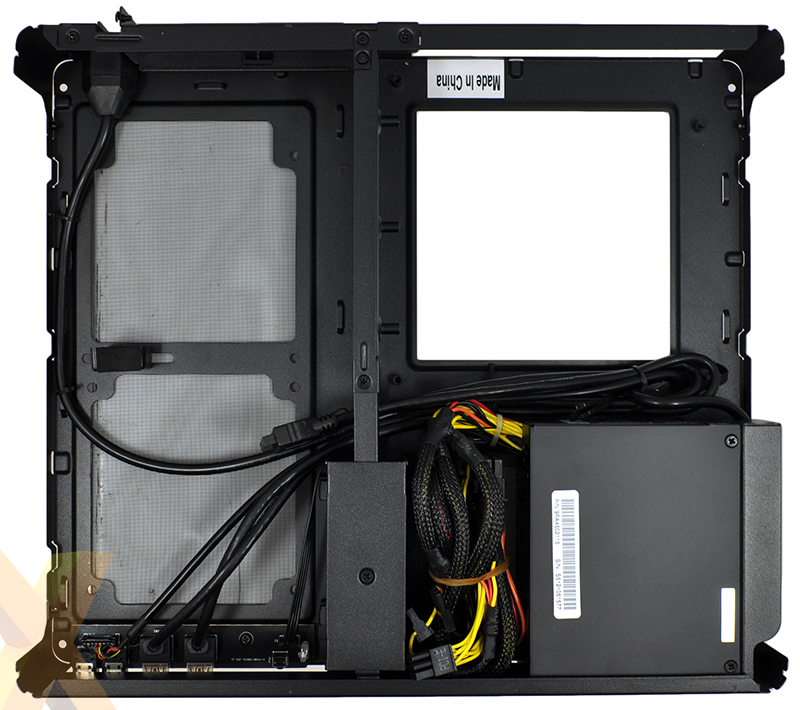
A birds-eye view provides a better sense of the available space as well as a look at the cabling scenario. The simple front I/O panel keeps clutter to a minimum by requiring only power and power-LED connectors, and both USB 3.0 ports attach to a single onboard header. The PSU's power port is pre-routed to the back of the chassis, but take note, the PSU is switched off by default and the toggle switch isn't accessible once the top cover is put back on. We found out the hard way, and if you're seriously conscious about electricity usage, you might not like the fact that the PSU power switch can't easily be reached when the system is up and running.
 |
 |
Getting our build started, we've installed an MSI Z97I Gaming AC motherboard outfitted with 16GB of Adata XPG DDR3 memory, as well as an Intel Pentium G3258 processor and a reference Intel cooler. It's a tight fit, but there are no obstacles to be aware of other than maximum CPU height - the ceiling is 56mm, so your options are limited. The storage tray, meanwhile, is a simple metal bracket that allows for two 2.5in drives to be screwed inside. Nothing fancy, but it works and the whole bracket is fixed in place via a single screw.
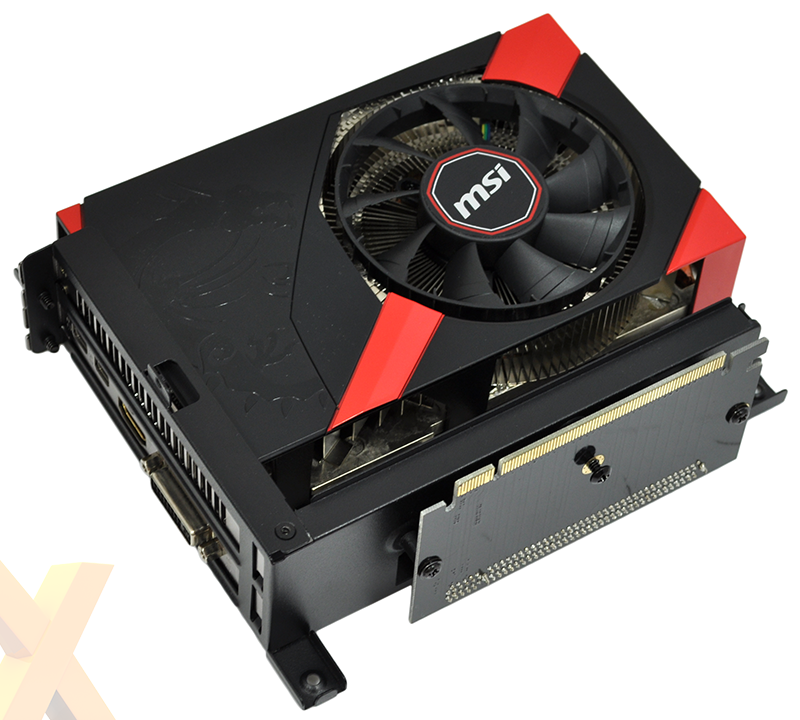
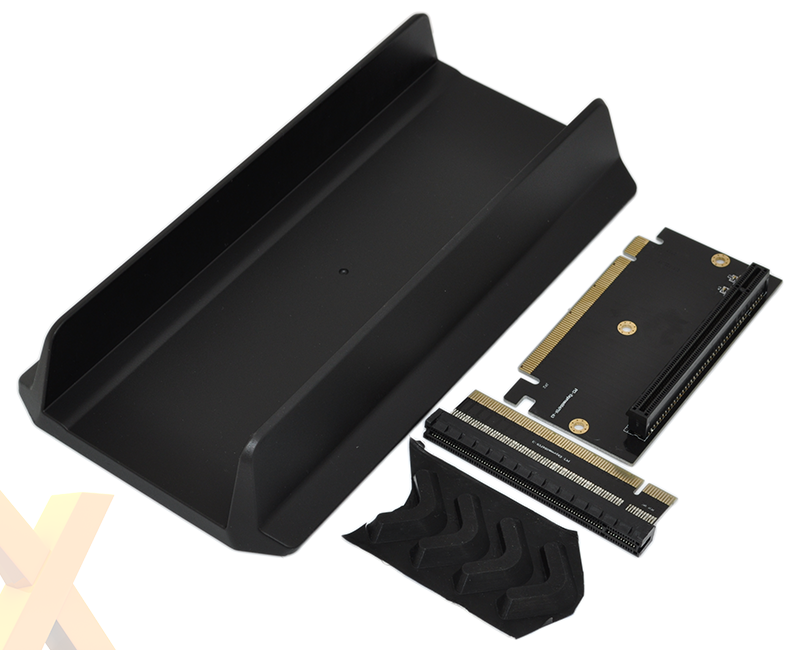
It's the graphics card provisioning that makes the Node 202 particularly interesting. Designed to offer high-end gaming capabilities, a graphics card measuring up to 310mm can be installed in its own dedicated chamber. This is made possible via a two-part PCIe riser that's included in the bundle, along with the vertical mount and optional rubber feet.
 |
 |
Putting the graphics card in first requires the user to remove the entire expansion slot assembly from the chassis by undoing four screws. With the module removed, the riser card can be fixed in place using three provided screws and the graphics card can be attached. Once the entire assembly is good to go, it slots back into the chassis with the riser card aligning perfectly to a mini-ITX motherboard's PCIe slot. Parts of the assembly do feel weak - the metal surrounding the expansion slots bends quite easily under pressure and changing the graphics card means taking the whole lot out again - however it's a neat way of enabling powerful graphics, and Fractal has paid attention to the details - there's even an adjustable standoff for the graphics card to rest on.
Our MSI Radeon R9 270X Gaming 2G ITX graphics card fits in with plenty of room to spare, and you could quite easily install, say, a GTX 980 Ti should funds permit. There's enough headroom with the 450W PSU, and keeping clutter to a minimum, said supply is outfitted with just six short connectors - ATX 24-pin (20+4), ATX 12V 8-Pin (4+4), a pair of PCI-E 8-pin (6+2) and two SATA.


